User checklists revolutionise event task management, giving organisers full control and visibility over tasks assigned to users such as exhibitors, speakers, and sponsors. Whether tasks are on the XpoBay platform or off-platform, organisers can ensure they are tracked and completed efficiently.
Why Are User Checklists Essential?
• Task Flexibility: Add any type of task, whether on-platform (e.g., completing a form) or off-platform (e.g., purchasing insurance, with users confirming by checking a box).
• Comprehensive Tracking: Organisers can monitor task completion for every user, ensuring no task is overlooked.
• Dynamic Task Assignment: Apply user types and categories to create tailored checklists that are 100% relevant to each user.
Key Features of User Checklists
1. Multiple Checklists
• Create both compulsory and optional checklists for users.
• Ensure tasks are prioritised and structured for maximum clarity.
2. Progress Tracking
• Organisers: See the average completion rate across all checklists assigned to a user. For instance, if an exhibitor has three checklists, the progress meter reflects their combined progress.
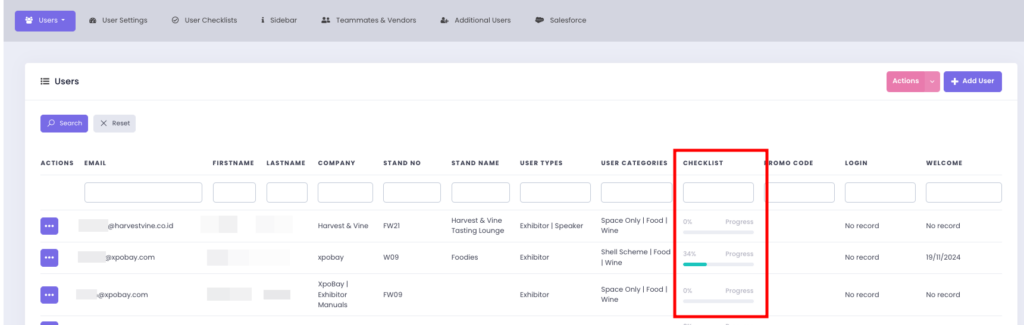
• Users (e.g., Exhibitors): Track their progress directly on the event page, with clear visual indicators to stay informed and motivated.
3. Task Requirements and Deadlines
• Set Deadlines for Tasks: Ensure tasks are completed on time by adding a deadline to each task.
• Make Tasks Compulsory: Require users to complete specific tasks before progressing further.
Now that you understand the importance of checklists, the next step is to learn how to create and assign them.
How to Create a Checklist
1. Go to Users.
2. Click User Checklists.
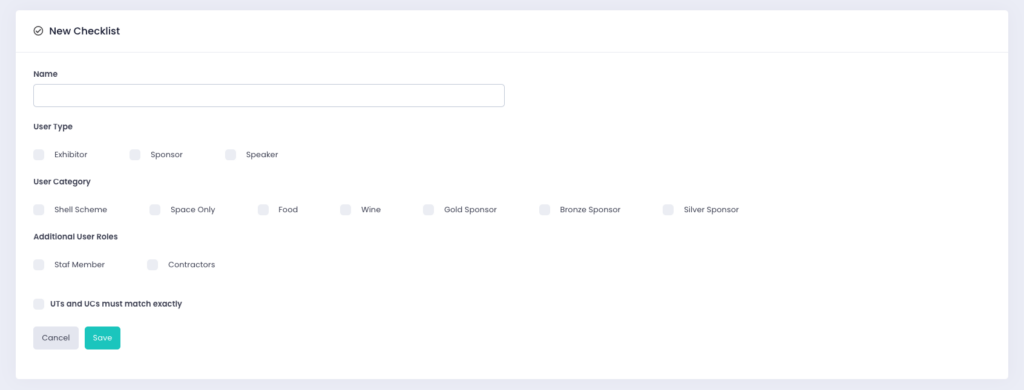
3. Click Add Checklist.

4. Name the checklist (e.g., “Exhibitor Checklist”).
5. Choose the relevant User Types, Categories, or Additional User Roles that this checklist will apply to.
6. After configuring the settings, click Save.
Once you save the checklist, it will appear on the User Checklists page.
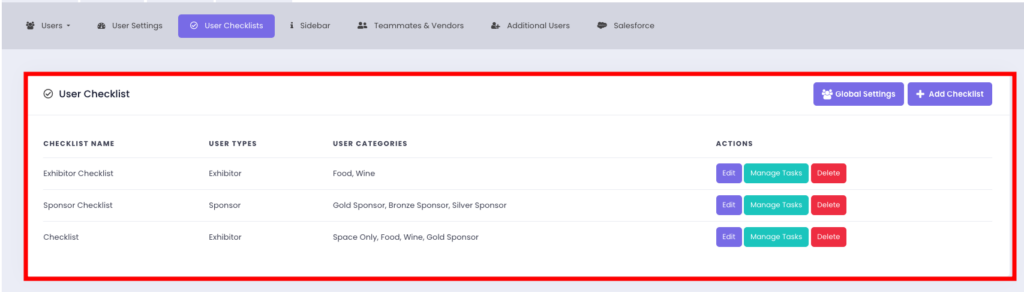
Import a Checklist
If you already have a checklist from a previous event, you can save time by importing it rather than rebuilding it from scratch.
– Go to User Checklists.
– Click Import Checklists.
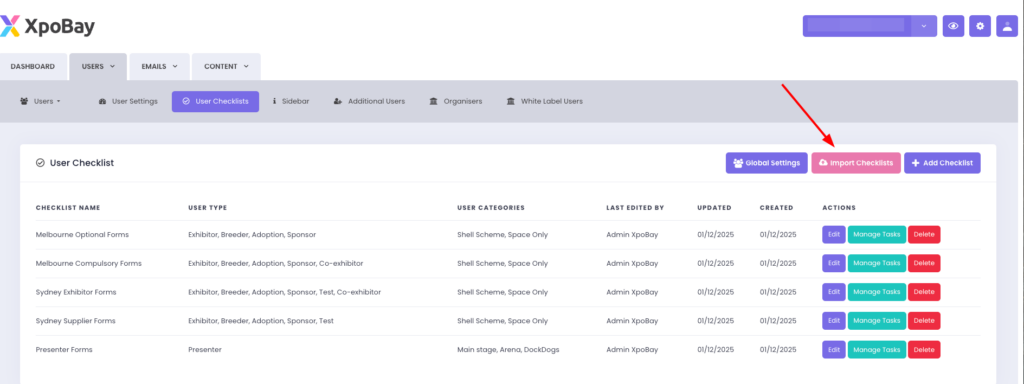
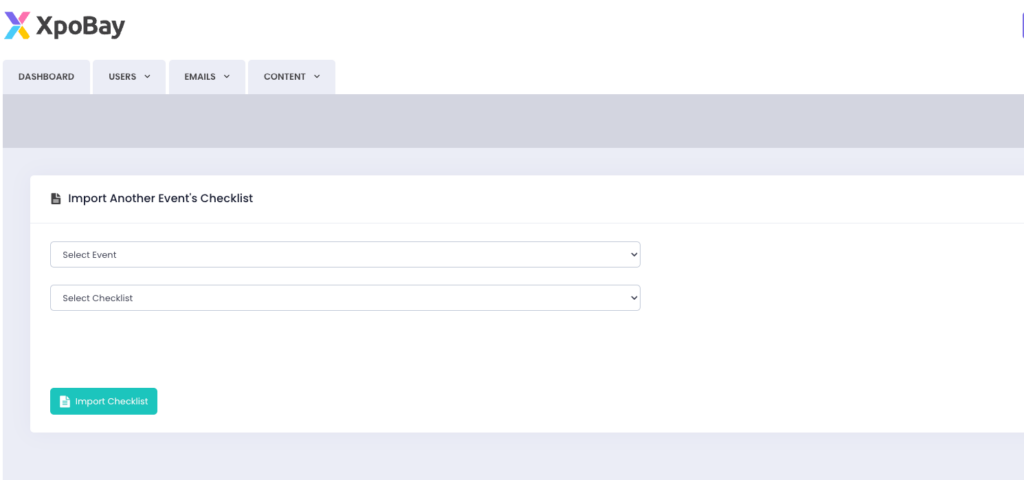
– Select the event you want to import from.
– Choose the checklist you wish to import.
– Click Import Checklists.
The imported checklist will appear in your list, and you can edit its settings or update its tasks as needed.
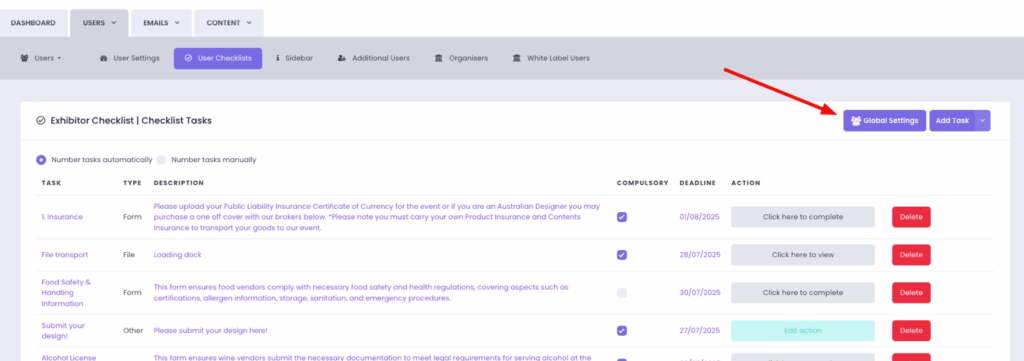
Adding Tasks to a Checklist
1. On the User Checklists page, choose the checklist you wish to add tasks to.
2. Click Manage Tasks.

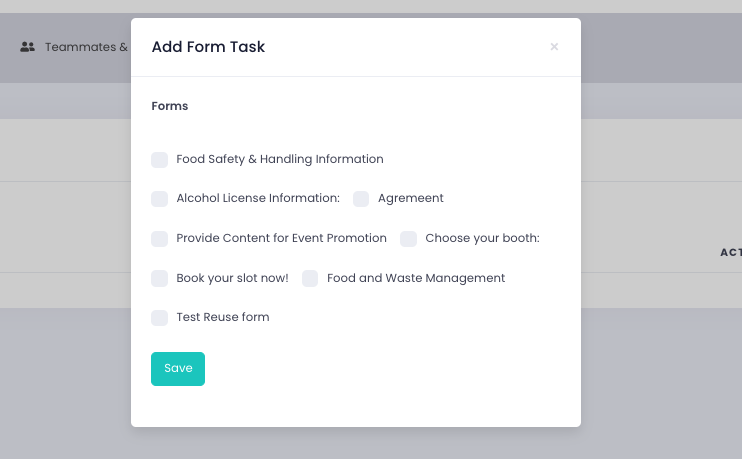
3. Click the Add Task button and select the appropriate task type:
– Add Form Task: Attach forms already created in the system.
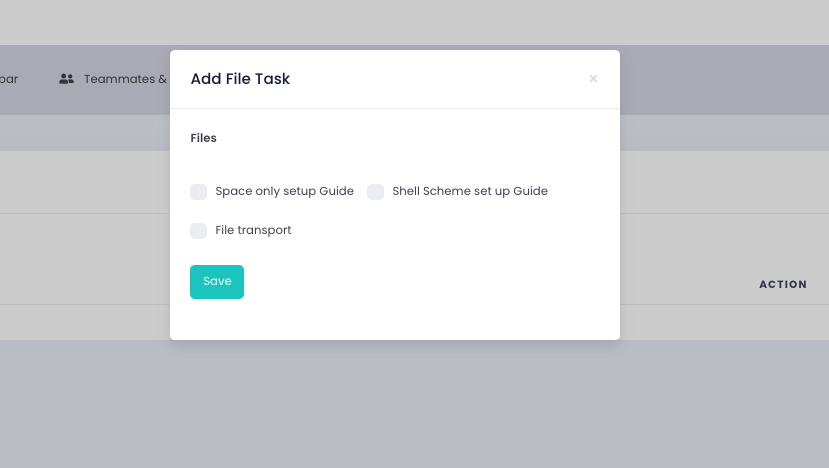
– Add File Task: Upload the files to the system by navigating to the ‘Content’ section and selecting ‘Files’.
When adding the task to the checklist, simply choose the file from the list.
Note: There are no restrictions on file formats, so you can upload any type of file needed for the task.
3. Add Other Task: Assign external tasks by providing a URL, giving users easy access to external resources directly from the checklist.
What Are External Tasks?
External tasks often involve collaboration with third-party vendors or completing actions beyond the platform. Examples include:
• Purchasing event insurance.
• Arranging AV equipment or furniture rentals.
• Designing and printing marketing materials.
• Shipping products or promotional items to the venue.
• Streamlining External Tasks with Integration: If you work with a vendor like ExpoNet, XpoBay allows seamless integration to simplify task management. Here’s how it works: Use the “Add Other Task” option to include the relevant ExpoNet URL in the checklist, allowing users to log in directly via XpoBay.

Tip: To maintain user focus, always tick the “Open page in new window” option. This ensures participants can access external resources without losing their place in the checklist.

By following the steps outlined above, you can create comprehensive checklists that streamline your event planning and execution, ensuring all participants are well-prepared and all tasks are completed on time.
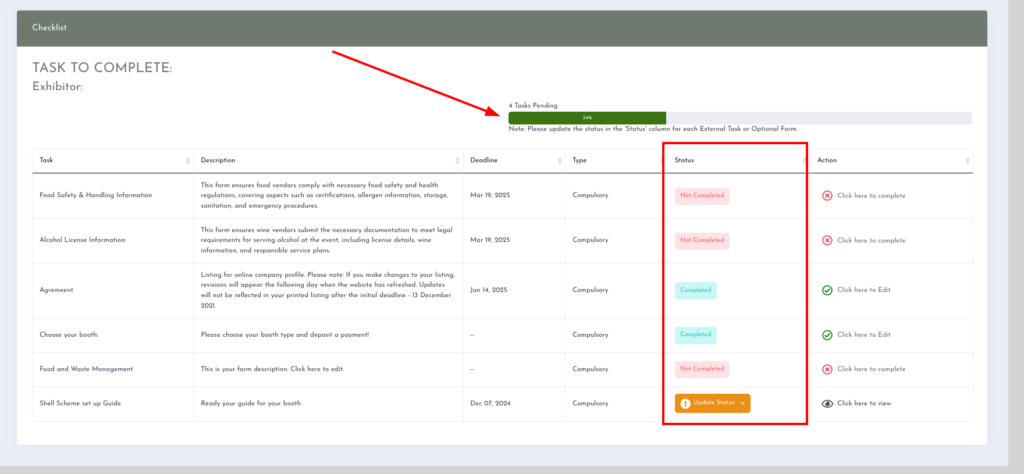
Understanding Compulsory and Optional Tasks
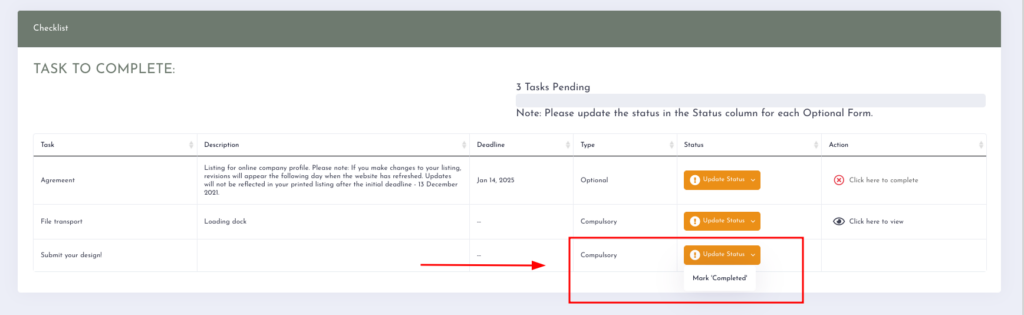
Tasks within a checklist can be marked as either compulsory or optional, and this applies to all task types (file tasks, form tasks, and other tasks). However, other tasks (tasks outside the system) have special conditions when added to event pages:
• Compulsory Tasks: If an other task that is not tied to the XpoBay is marked as compulsory, users must mark it as Completed.
• The option to Mark Not Required will not be available. This ensures that critical tasks are completed as required.
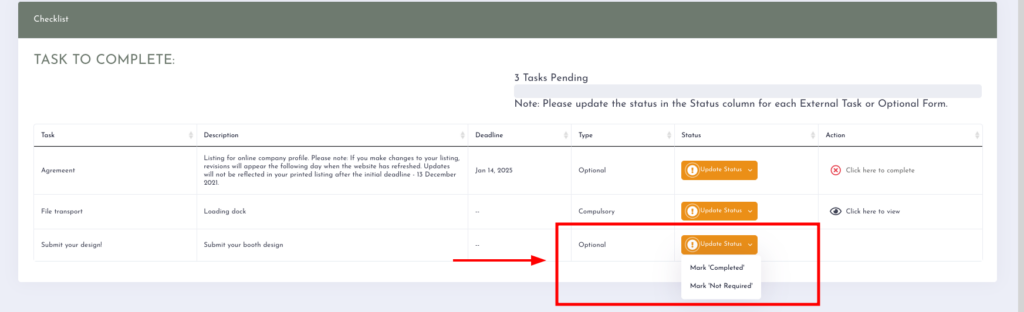
• Optional Tasks: If an other task is not marked as compulsory, users will see two options in the “Update Status” dropdown: Mark as Completed and Mark Not Required.
Global Settings in User Checklists
Global Settings is a critical feature that allows organisers to control task visibility and assignments across all checklists. It simplifies managing multiple checklists by centralising configurations.
There are two types of Global Settings available in User Checklists, and each serves a different purpose:
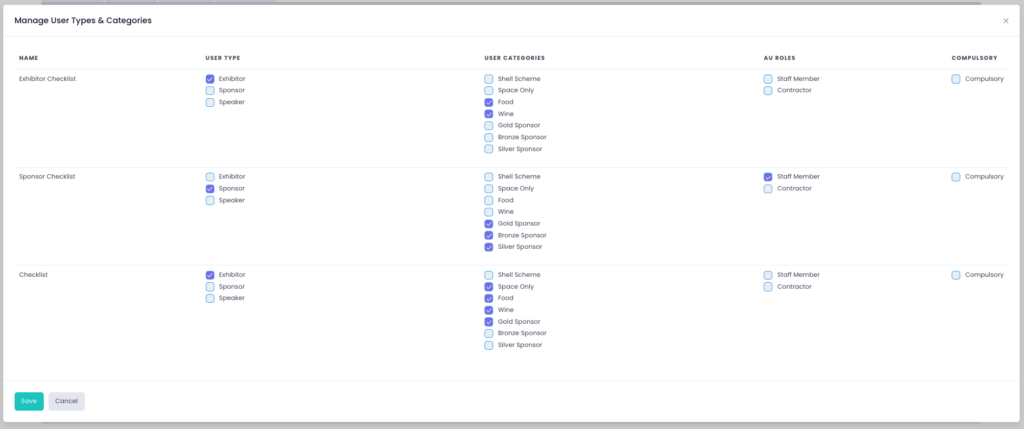
• Global Settings on the User Checklists Page
On the User Checklists page, you will see a Global Settings button. This controls which users the checklist applies to.

Use this to:
– Assign the checklist to specific User Types and User Categories.
– Filter further using Additional User Roles, if applicable.
This ensures that each checklist is only displayed to the right users based on how they’re grouped.
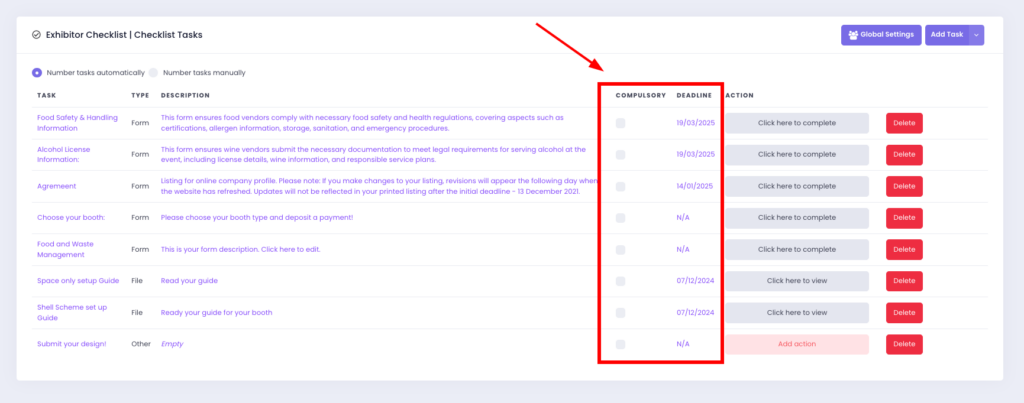
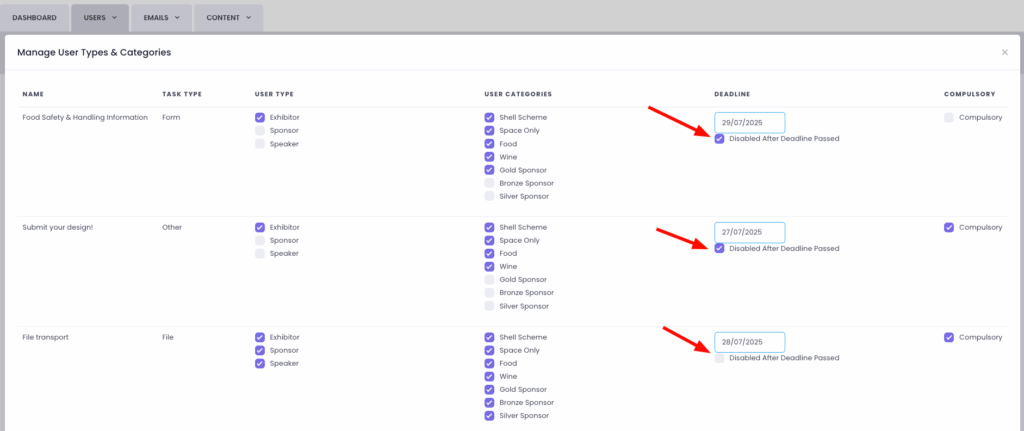
• Global Settings inside Manage Tasks
Once you open a checklist by clicking Manage Tasks, you’ll find another Global Settings. This version controls how individual tasks behave within the checklist.
Use this to:
– Adjust task visibility by User Types and User Categories.
– Set a Deadline for each task.
– Enable “Disable After Deadline Passed” to stop users from submitting or updating tasks after the deadline.
– Mark tasks as Compulsory.
Enable Reminders for Automatic Notifications
To ensure users are automatically reminded about their checklist tasks, you need to enable Reminder Emails. These reminders notify users of any incomplete tasks.
You can configure options such as the frequency (weekly, fortnightly, or monthly), the time zone, and the start date. Enabling Reminder Emails helps participants stay on track and ensures tasks are completed on time.
For detailed instructions on setting up reminders, visit our guide: Reminder Emails.