Save time and resources by effortlessly sending form data to other systems, such as your event website, using XpoBay’s Event Feeds.
With XpoBay Event Feeds, you can showcase exhibitor profiles, exhibitor products, speaker profiles, and more on your show website automatically. Additionally, this feature can be extended to send form entry data to other locations.
IMPORTANT: Request your EVENT FEED URL from XpoBay
If you want to send form data to another website, like your event website, simply contact XpoBay and request your EVENT FEED URL.
All form entries with the “Sending Form Data to Another Website” configuration will be visible in your XpoBay feed. You can choose between a JSON or XML feed URL, with JSON being the recommended option. One feed URL is sufficient for each event.
After receiving your EVENT FEED URL from XpoBay, share it with your web developer for feed configuration. Typically, your developer can use a WordPress plugin to import new entries and update existing ones periodically. This amazing time-saving feature allows you to display and update information from multiple forms automatically on your event website.
Note: Additional fees may apply for using XpoBay Event Feeds. For more details, get in touch with XpoBay for clarification.
WordPress Configuration
For WordPress-hosted event websites, numerous WP plugins are available to quickly and easily import and update data from your FEED URL.
The recommended approach is to use WP All Import with the ACF Pro add-on. This combination can handle importing both images and data from the JSON feed effectively. WP All Import also includes functionality to resize images during the import process.
For image optimisation, plugins like Smush or EWWW can automatically compress and optimize the images once they’ve been imported into the Media Library.
Notifications: More than Just Emails
XpoBay’s notification system goes beyond sending emails. You can set up your form to send data to another website or URL.
Configuring Notification Settings
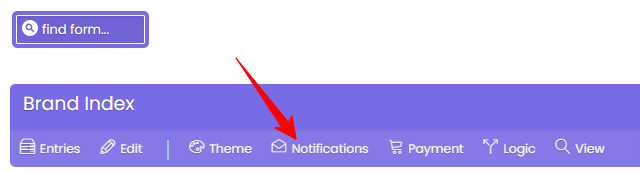
To get started, access your form notification settings and click on the Notifications menu in your form manager.
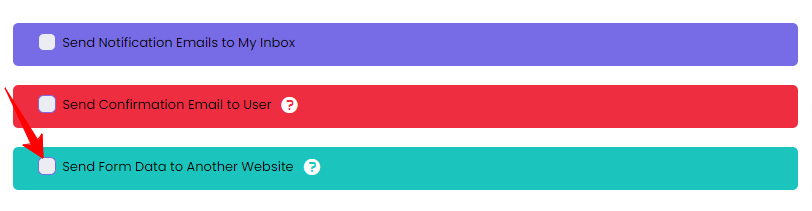
Enable the “Send Form Data to Another Website” option.
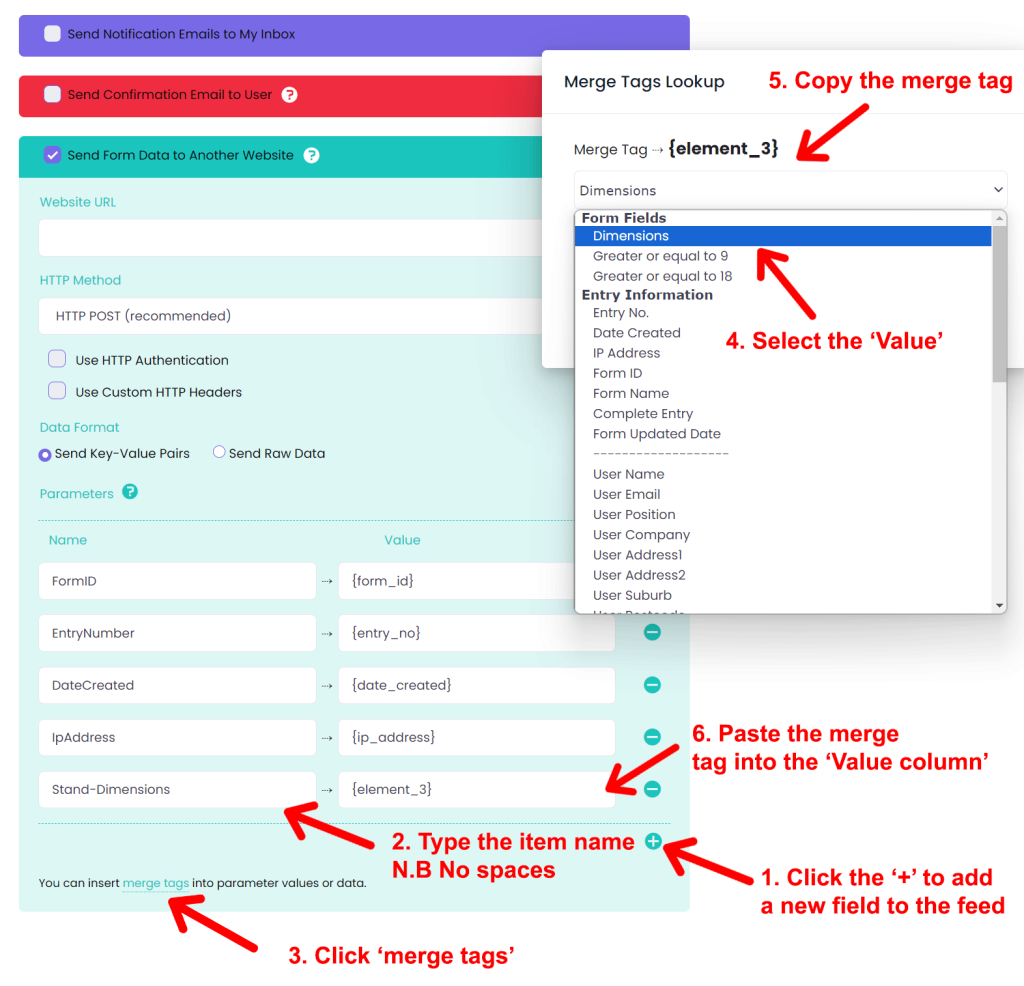
Now, configure each form to send data to the EVENT FEED URL. You can label the left-hand column as required.
In the right-hand column, choose the data you want to send, either from the form or associated with users’ accounts, like User Type, email address, company, or stand name. This allows you to send any desired data to the event feed.
Use the “merge tags” link at the bottom left of the page to access a list of all merge tags. Select the data you need and copy-paste the merge tags into the “Value field.”
Repeat these steps for all the data you want in your feed.
You’re done – so click save!
Click “Save” and leave other settings at their default values.
Verify Your Feed is Working
To ensure the feed is functioning correctly, visit the EVENT FEED URL. Make sure there are some submitted entries (you can add and delete test entries later) to see the forms and all current entries.
After importing into WordPress or your CMS, consider deleting any test entries to keep things tidy.