As an organiser, you can easily manage form entries submitted by exhibitors or other users. This guide will walk you through the process of viewing and filtering form entries in your event portal.
The Form Entries page allows you to customise displays, sort data, and apply filters for efficient analysis.
Accessing Form Entries
1. Navigate to the Form Manager
– Go to the Content section of your event portal.
– Select Forms from the menu.
2. Select the Desired Form
– Locate the form whose entries you want to review.
– If there is an entry, on the right side of the form names, you’ll see the total number of entries highlighted in green.

– Click the form name to open its options.
– Choose Entries from the options.

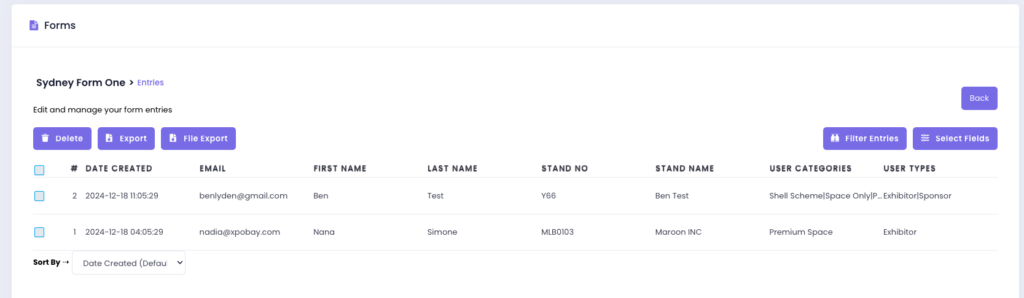
3. Viewing the Entries Page
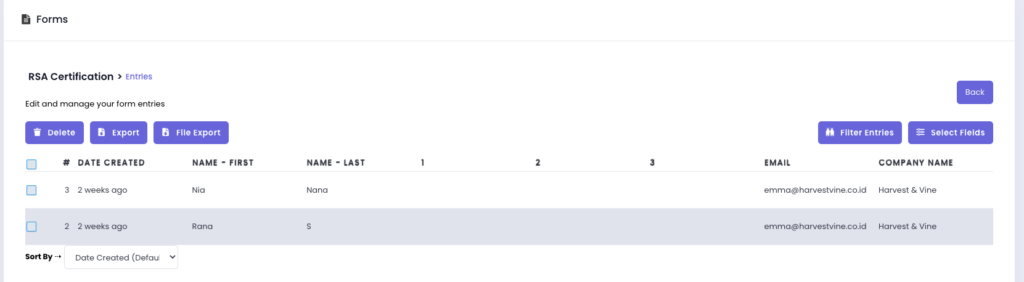
– The Form Entries page will appear, displaying all submitted entries.
Filtering Form Entries
The Form Entries page provides robust filtering and customisation options to help you locate and display the data you need from the specific form.
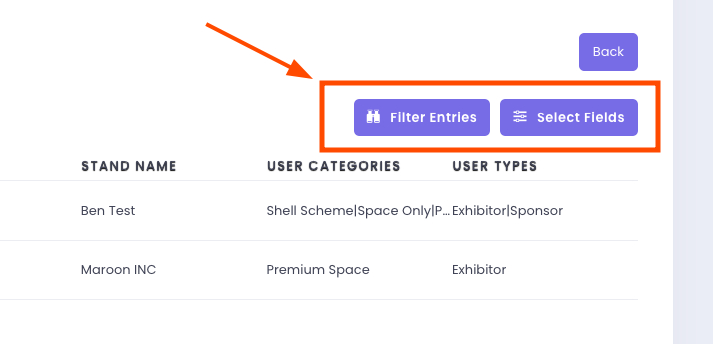
Filtering Options
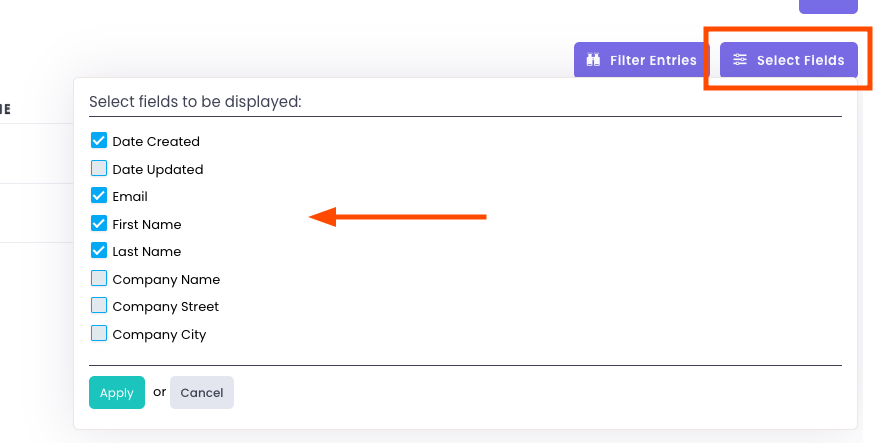
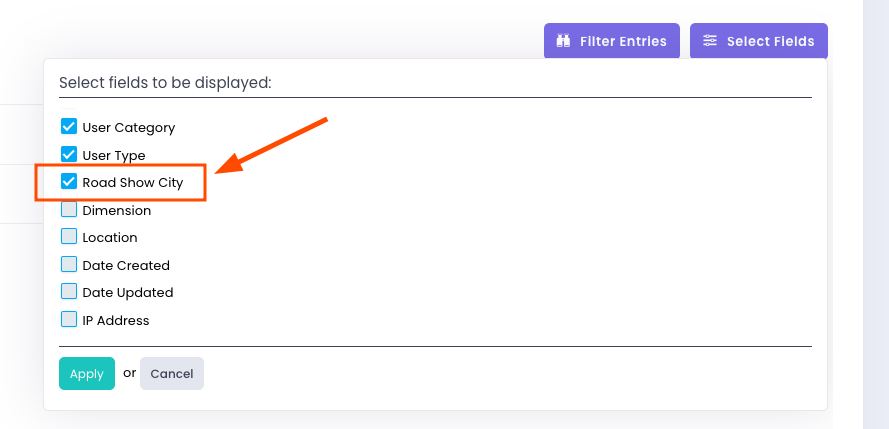
• Field Selection:
Choose which fields to display (e.g., Date Created, Date Updated, Email, First Name, Last Name, Company Name).
Click Apply, and the page will refresh automatically with your selected fields.
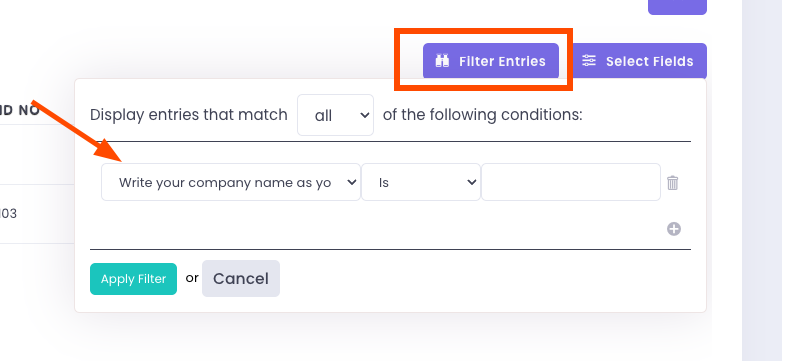
• Condition-Based Filtering:
Apply filters to find specific entries based on conditions. For example:
– Filter entries where the email ends with “gmail.com”.
– Filter entries where the text begins with a specific word or value.
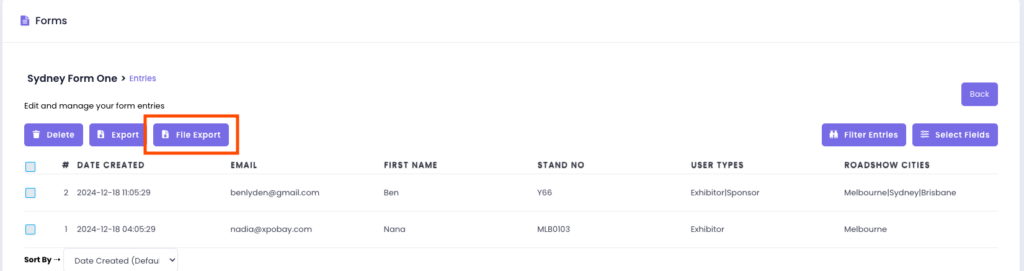
Roadshow-Specific Filtering
If you’re managing a Roadshow event, roadshow-specific filtering allows you to filter a single form based on the event location. This makes it easier to:
– Identify submitters associated with specific event locations (e.g., Melbourne, Sydney).

Editing Form Entries
Organisers have two ways to edit form entries:
1. Directly from the Form Entries List:
• Navigate to the Form Entries section.
• Click on an individual entry from the list.
• Click Edit to make changes to the entry.

Additional Actions Available:
When selecting an entry, organisers will also see these options:
• Email – Send the entry via email.
• Print – Print a copy of the form entry.
• PDF – Download the entry as a PDF.
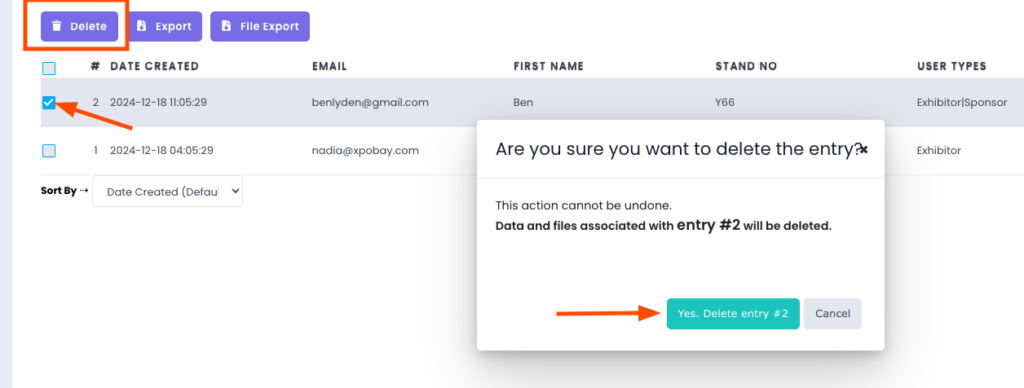
• Delete – Remove the entry if needed.
2. Logging in as the Exhibitor:
• Instead of editing directly, organisers can log in as the exhibitor.
• This allows them to access and modify the form entry from the exhibitor’s perspective.
Important Note: this method is not recommended for editing form entries. Any changes made this way will appear as if the exhibitor edited the form, which could lead to confusion. Instead, always edit entries directly through the Form Entries section to maintain accurate records.
Exporting and Deleting Form Entries
Exporting Form Entries
You can export form entries in various formats to suit your needs. There are three export options:
– Export All Fields: Export all data fields from the form.
– Export Selected Fields: Export only the fields you choose.
– Export Users Who Have Not Completed the Form: Generate a list of users who haven’t completed the form.
Exported files can be downloaded in the following formats:
– Excel (.xlsx)
– CSV (.csv)
– TXT (.txt)

If the form requires submitters to upload files (e.g., images, documents), you can also export these files. The file export feature allows you to download all submitted attachments for easier access and management.
Deleting Form Entries
If needed, you can delete submitted data directly from the Form Entries page. This ensures you maintain control over the data stored in your portal.
Managing form entries in your event portal is straightforward and ensures you have quick access to the information you need.