Face Detection is a feature available within the Custom Banner Template Editor that uses artificial intelligence to automatically position faces within image layers. This is particularly useful for banners that include headshots, such as speaker banners or ID badges where a face must be prominently displayed.
Activating Face Detection
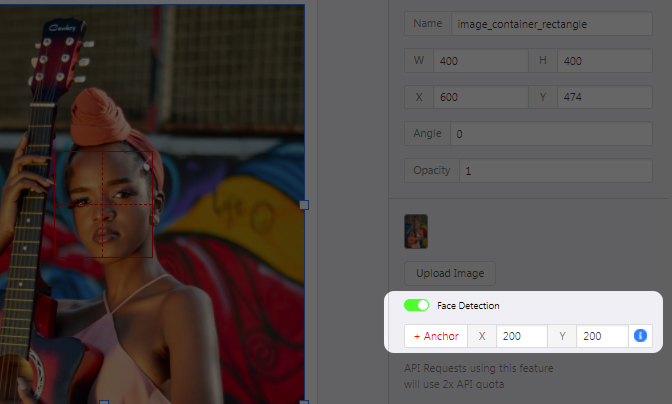
To enable Face Detection, follow these steps:
1. Open the Custom Banner Template Editor and select or create a banner.
2. Add an Image Layer to your template. This could be in a rectangle or a circle shape.
3. While selecting the image, toggle on Face Detection.

4. The system will automatically centre the detected face within the image container.
5. If you need to adjust the positioning, you can manually set a custom Anchor to reposition the face.
Customising Face Positioning
By default, the Anchor coordinates are set to:
• X: 180
• Y: 180
However, depending on the design of your template, you may want the face to appear in a specific position rather than the centre. For example:
• Centered positioning: Ideal for ID badges and profile banners.
• Offset positioning: Useful for designs where the face should appear slightly to the right or left.
By adjusting the Anchor settings, you can control where the face appears within the image container.
Notes
• Face Detection ensures automatic face positioning, but for highly customised designs, manual adjustments may still be required.
• If the design requires precise alignment, complex layouts, or advanced styling, consider working with a professional graphic designer to ensure a polished and professional appearance.
• Always test your banner with different images to ensure faces are positioned correctly across various uploads.