Welcome to the XpoBay Event Portal Editor guide. This guide covers all the features and tools available for editing your event portal. You’ll learn how to structure your portal, use blocks, format content, and add dynamic elements like accordions, buttons, and icons.
Use the menu below to jump to specific sections:
- Understanding Blocks and Layouts
- Adding and Formatting Content
- Media Management (Images, Embeds, Files)
- Interactive Elements (Accordions, Buttons, Alerts)
- Using the Format Painter and Styling
- Pasting Content and Anchor
- Advanced Tips and Troubleshooting
Understanding Blocks and Layouts
Blocks are the building blocks of your event portal. They allow you to structure your content visually, from single-column layouts to complex grids with multiple columns.
This video introduces the block system used to build your event portal. You’ll learn how to select, add, and customise blocks to structure your page clearly and efficiently.
Key Features
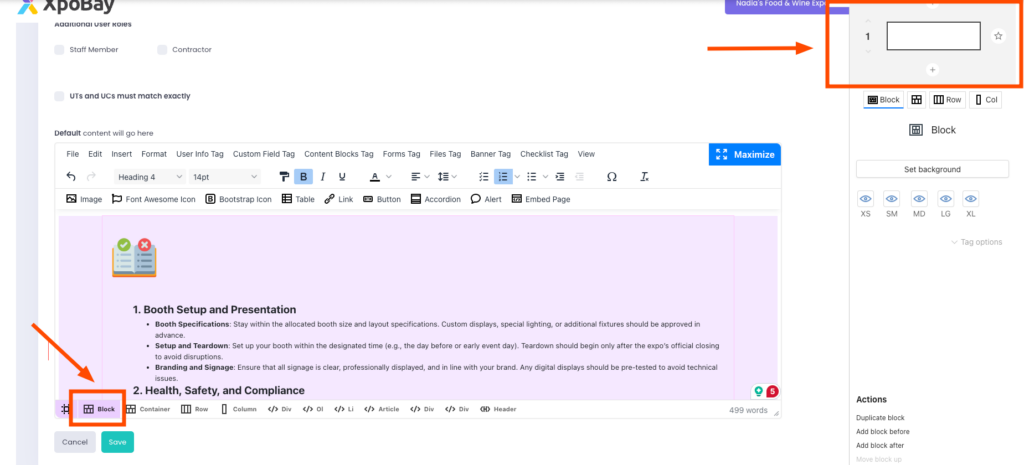
1. Selecting Blocks:
– Click to Select: Simply click on a block to select it for editing.
– Use the Block Selector: For precision, utilise the block selector at the top of the editor.
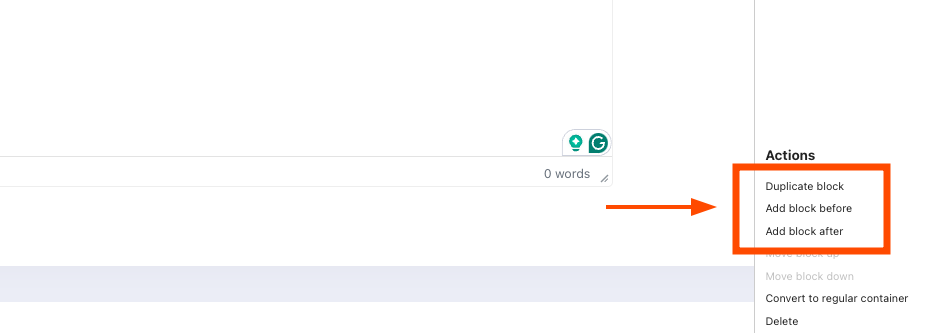
– Critical Step: Always select a block before moving, editing, or adding new blocks above or below it. This ensures smooth adjustments without impacting unintended elements.
2. Adding Blocks:
– Insert New Blocks: Click the “Add Block” button to insert blocks above or below the current one.
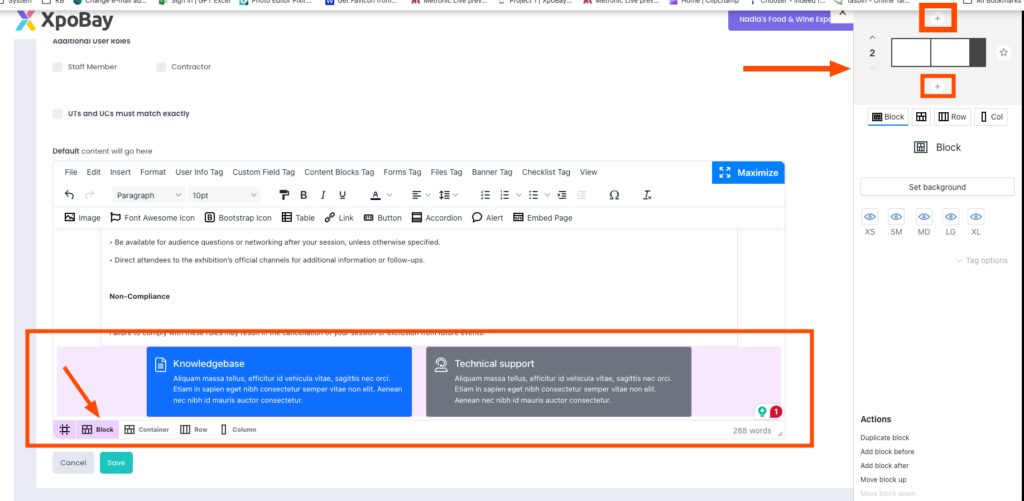
– Block Gallery: When you add a block, a block gallery will appear, allowing you to select your desired column layout.
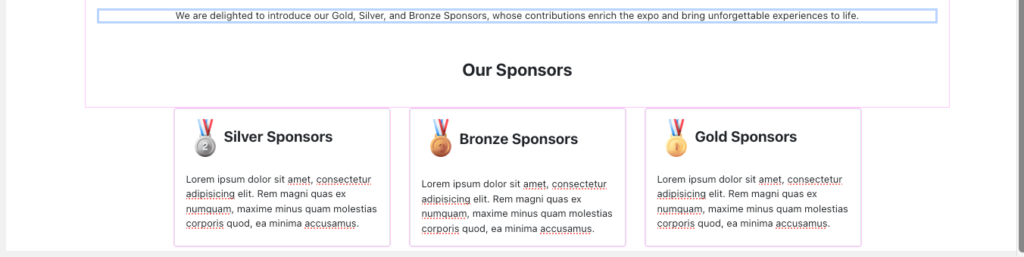
– Example Usage: Use a 3-column layout to display multiple sponsors, services, or features side by side.
3. Editing Layouts:
– Resize Columns: Adjust column sizes using the grid selector to modify layouts (e.g., change a layout from 4/12 + 8/12 to 6/12 + 6/12 for balanced content).
4. Maximised Editing Mode:
– Expand Your View: Use the Maximise button to enlarge the editing area for working with complex blocks or dense content.
Adding and Formatting Content
Learn how to format text, use headings, and link to internal and external pages.
Key Features
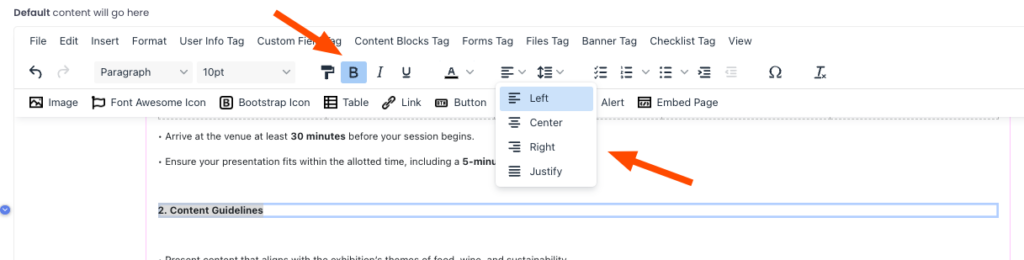
1. Formatting Text:
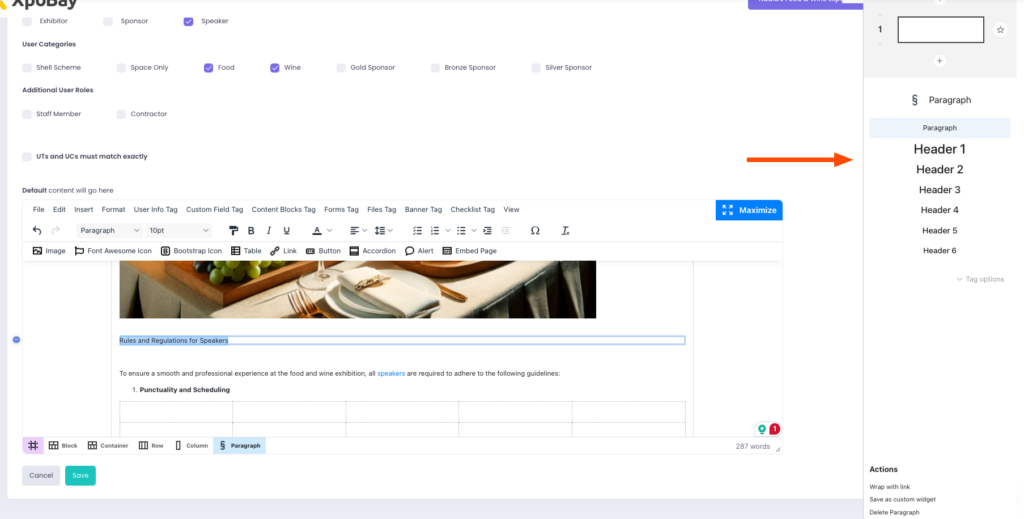
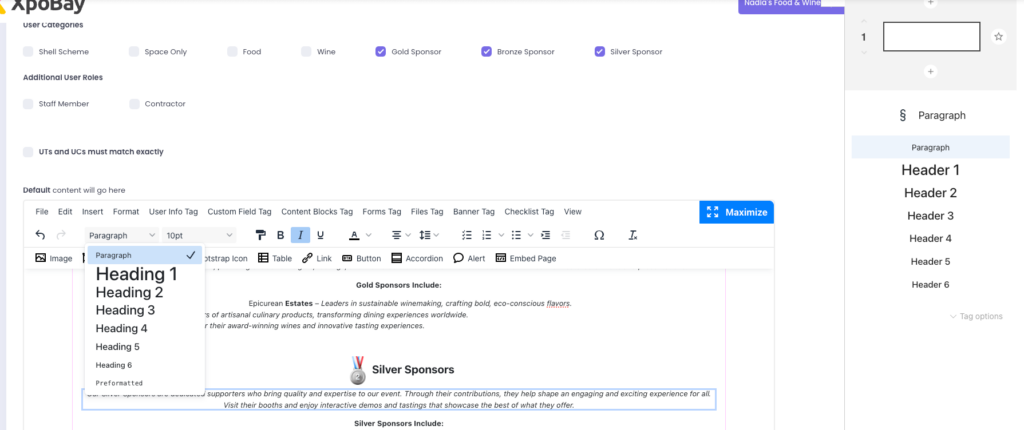
– Use Headings: Apply headings (H1, H2, etc.) for consistency and better structure. Avoid selecting custom font sizes manually.
– Text Styles and Colours: Text styles like bold, italics, and colours are automatically inherited from your event branding, ensuring a cohesive design.
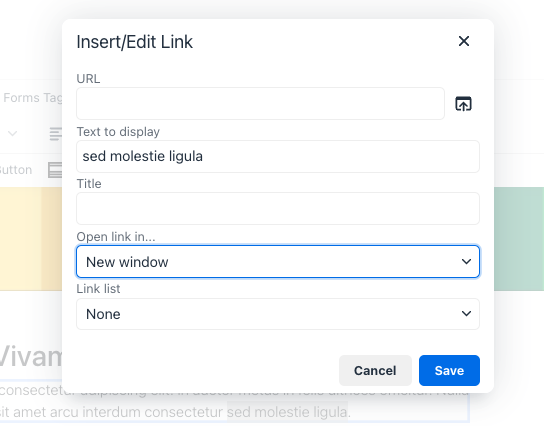
2. Adding Links:
– Create Hyperlinks: Add hyperlinks to external or internal pages by highlighting the text you want to link. This ensures seamless navigation.
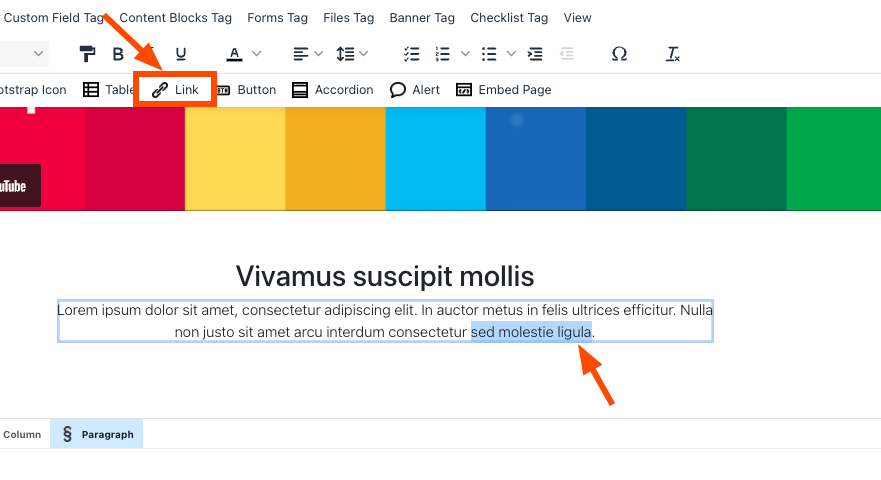
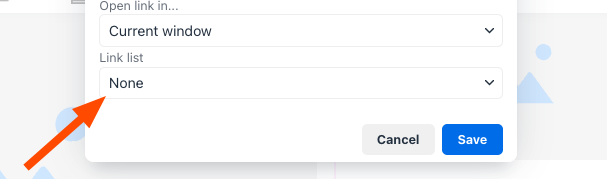
– Link Selection: Link text to external or internal pages by selecting the desired page from the link list or by copying the URL.
For example, if the URL of your page is:
https://my.xpobay.com/home/index/680/Speaker-2
Copy the last part /Speaker-2 and paste it into the URL field.
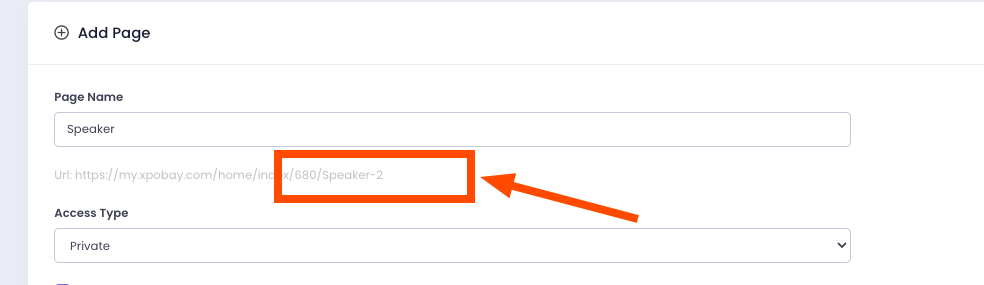
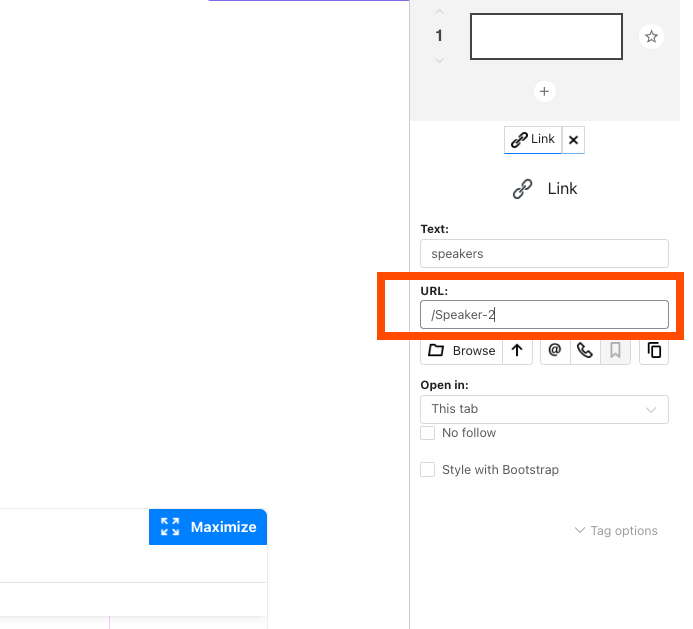
Note: Avoid using commas when naming your pages (e.g., /Speaker,2) as this can break link functionality. The name will be automatically generated as part of the link.
– Open in a New Window: Enable this option to ensure the link opens in a new tab, providing a seamless user experience while keeping the original page accessible.
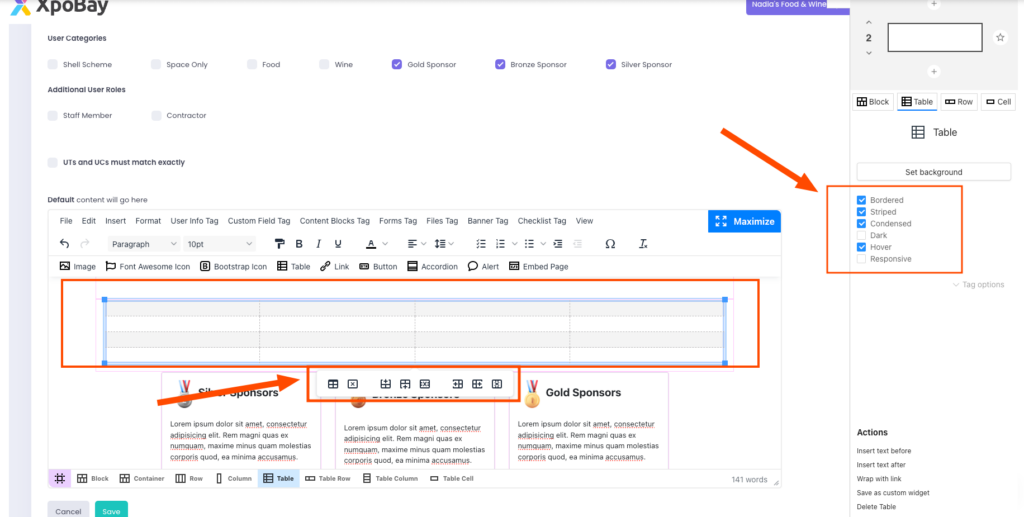
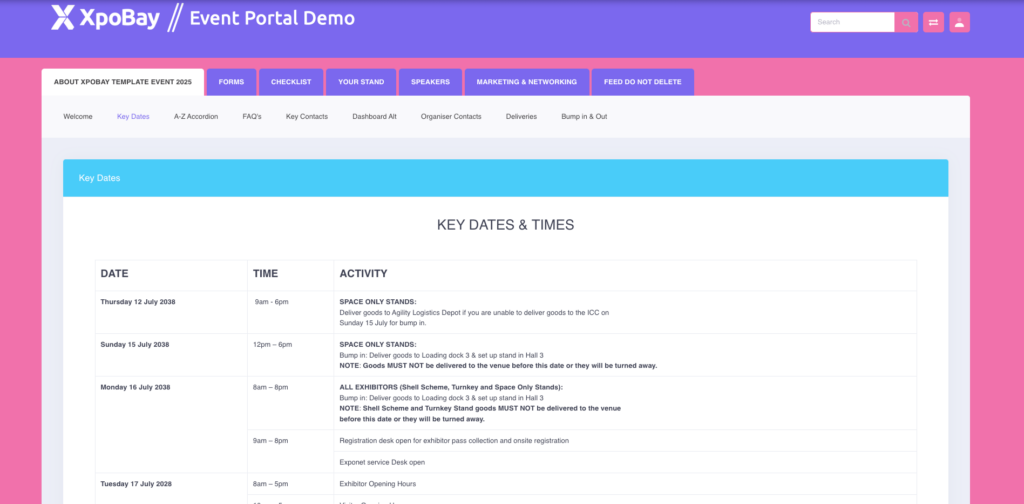
3. Using Tables:
– Insert Tables: Use tables to organise structured data such as agendas, pricing, or schedules.
– Customisation Options: Customise tables with styles bordered or striped to enhance readability.
4. Bullet Points and Lists:
• Bullet points and numbered lists automatically inherit the colours and styles defined in your event branding, ensuring a consistent design throughout your portal.
• While lists follow branding settings, you can further customise them by adjusting indentation, alignment, or spacing within the editor for better readability

Media Management
Images, embeds, and files enhance your event portal visually and functionally. Here are the key features to manage your media effectively:
Key Features
1. Uploading and Editing Images
– Insert Images: Upload images directly using the “Insert Image” button.
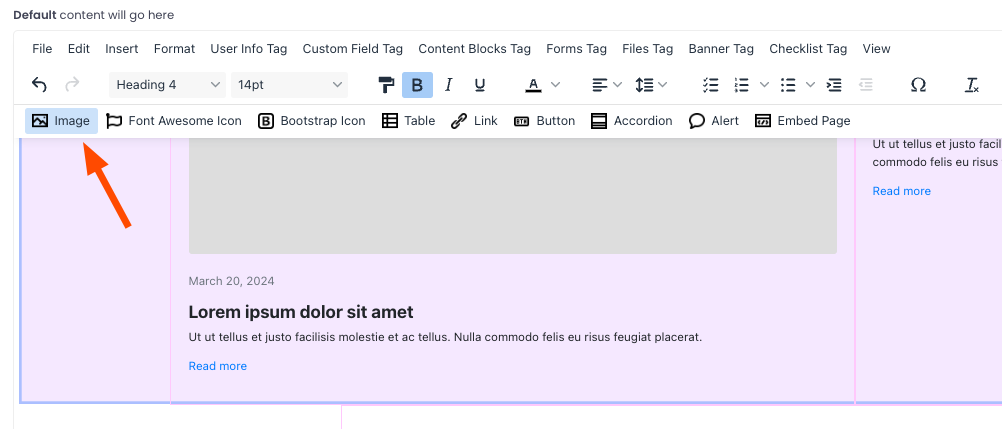
– Edit Images: Utilise the built-in editor to resize, crop, or rotate images for a polished appearance.
– Enhance accessibility by providing alt text for your images. The alt text describes the content or purpose of the image.

2. Embedding External Content
– Embed External Media: Use the “Embed Page” button to integrate YouTube videos, PDFs, or other external pages seamlessly.
– Responsive Design: Ensure embedded content is responsive to provide an optimal viewing experience for mobile users.
3. Adding Files
– Upload and attach downloadable resources, such as event brochures or guides, directly to the portal to ensure easy access for users.
For detailed instructions, refer to the File Upload Guide.
Interactive Elements
Interactive elements, such as accordions, buttons, alerts, and icons, enhance your portal’s interactivity and engagement. Here’s an overview of their key features:
Key Features
1. Accordions
– Collapsible Sections: Use accordions to organise FAQs or present detailed content in a compact and accessible way.
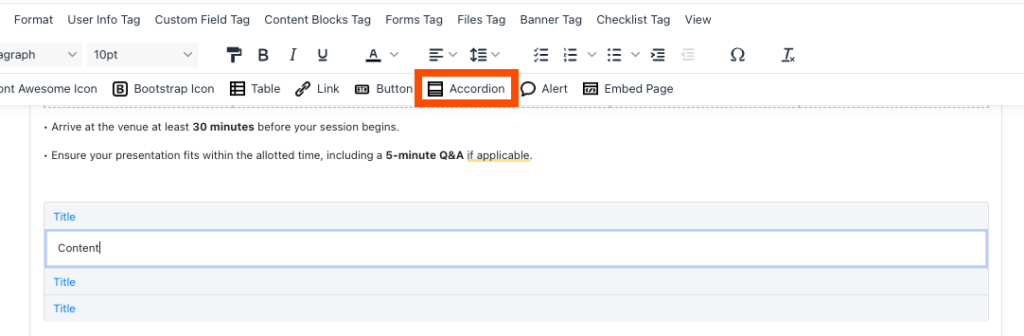
– Accordions can be tricky to work with. When editing:
• Avoid Overwriting Titles Directly: If pasting over a title, leave one letter or character intact before pasting new text. This prevents breaking the heading structure.
• Undo Extra Spaces: Editing accordions may sometimes introduce unwanted spaces. Use the undo option or manually adjust to clean up.
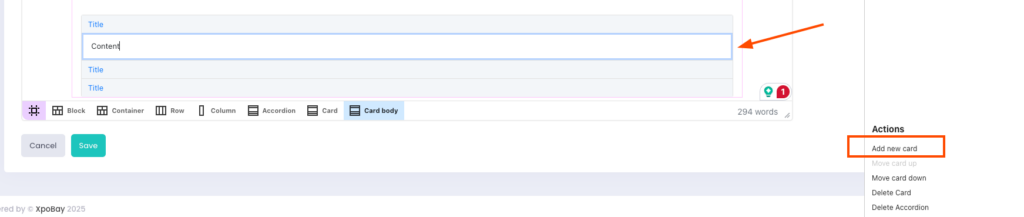
• Adding New Cards: Select “Card” and click Add New Card to insert additional sections. New cards will always appear below the existing ones.
• Workaround for Pasting: To replace a title without breaking formatting, leave a small part of the original text, paste your new content, and then delete the leftover characters. While not ideal, this workaround helps avoid structural issues.
2. Button
• Add buttons to guide users with clear calls to action, such as “Register Now” or “Learn More”.
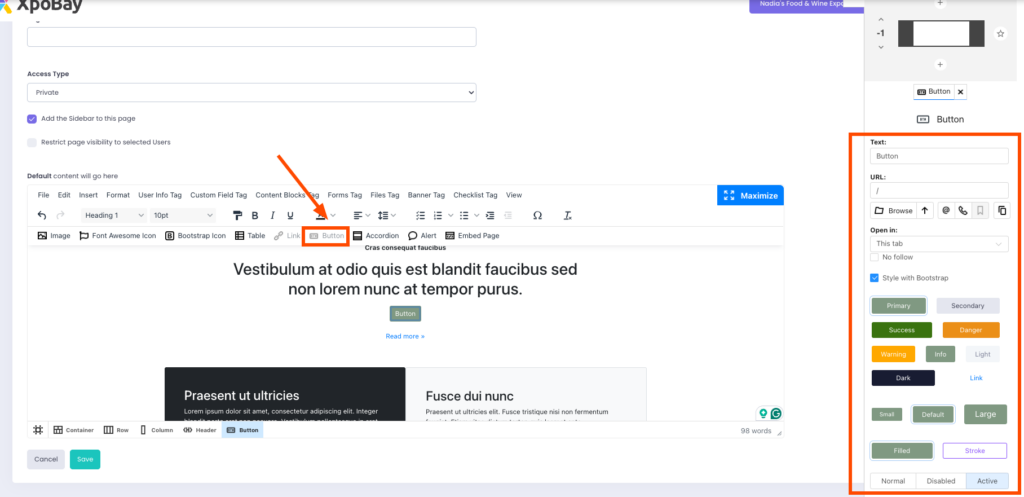
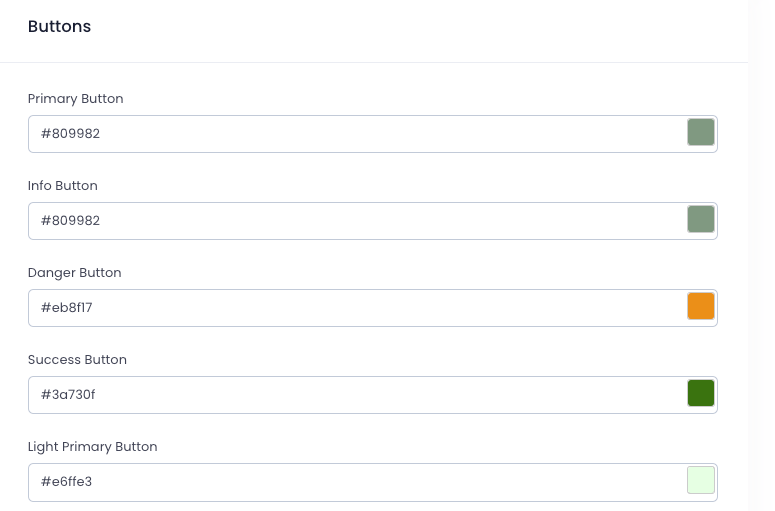
• Customise button styles, including colours, sizes, and text alignment. Button colours can be adjusted in the Event Portal Branding.
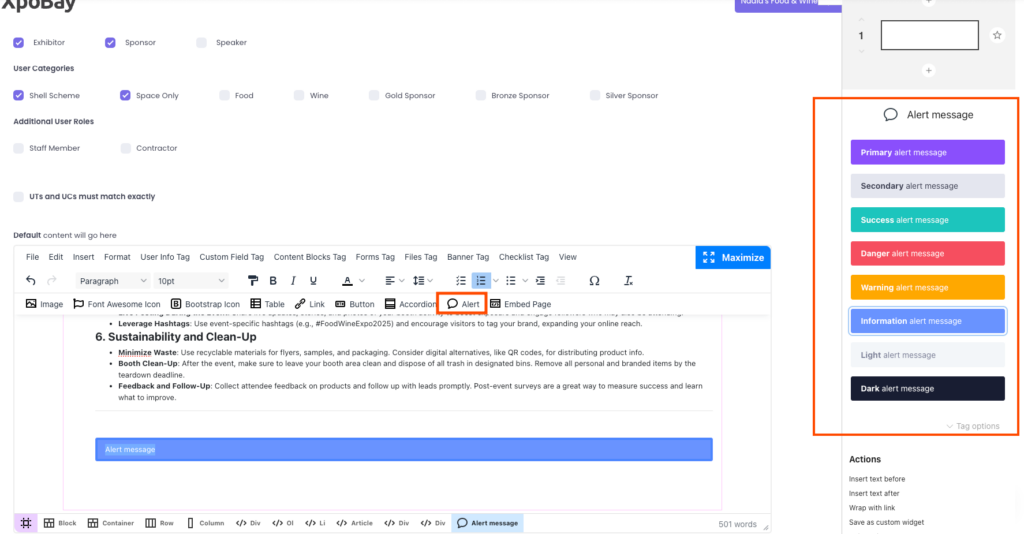
3. Alerts
• Use alert boxes to highlight important notices, updates, or warnings.
• Customise alert icons, colours, and text to draw attention to critical information.
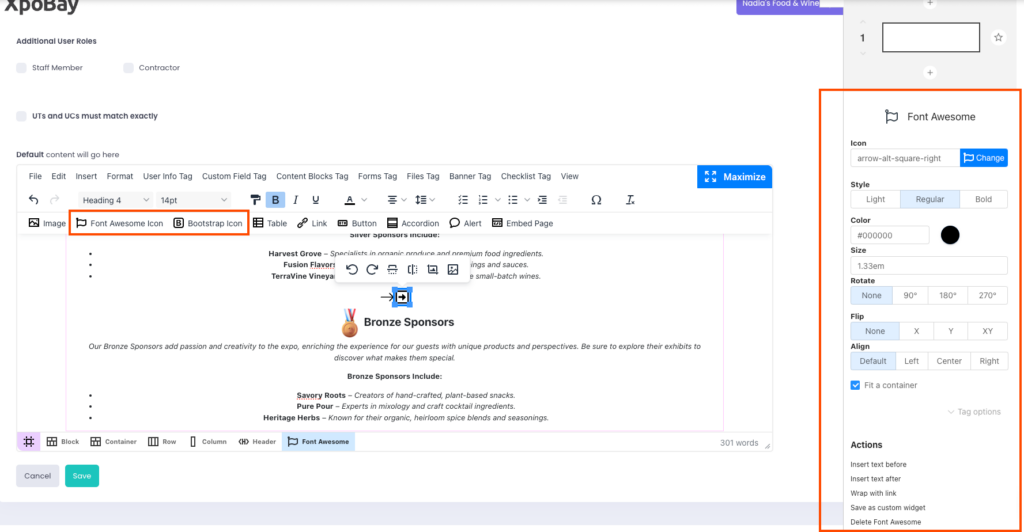
4. Icons:
• Enhance visual clarity and design by adding icons, such as those from Font Awesome.
• Icons can emphasise key points or improve navigation.
• Icons can also be wrapped with links, allowing them to function as clickable elements for navigation or actions.
Using the Format Painter and Styling
The Format Painter is a powerful tool to maintain a consistent and polished look across your portal.

Here’s an overview of its key features:
1. Clearing Styles:
• Quickly remove unwanted styles or reset text formatting using the Format Painter.
• It’s especially helpful for cleaning up content pasted from external sources to match your portal’s design.
2. Consistency Tips:
• Stick to pre-defined branding colours and fonts to ensure a cohesive and professional design throughout your portal.
• Consistent styling reinforces your brand identity and enhances user experience.
Pasting Content and Using Anchor
Copying and pasting content can sometimes lead to formatting issues. To maintain consistency and avoid problems, follow these best practices:
1. Pasting from Word:
• Avoid pasting content directly from Word, as it can introduce unwanted styles and formatting that may not align with your portal’s design.
• Instead, paste the content as plain text and reformat it within the editor to match your desired style.
2. Pasting Images:
• While it is possible to paste images directly, uploading them manually ensures better quality, resolution, and control over placement and formatting.
Adhering to these best practices will help you maintain a polished and professional appearance throughout your portal.
3. Anchor link:
To send someone directly to a specific section of a page, you can use an anchor link.
How to Create an Anchor Link
1. Open your page in the Page Editor.
2. Click the text or block where you want people to jump to.
3. In the toolbar, click the Anchor icon
4. Give your anchor a simple ID name
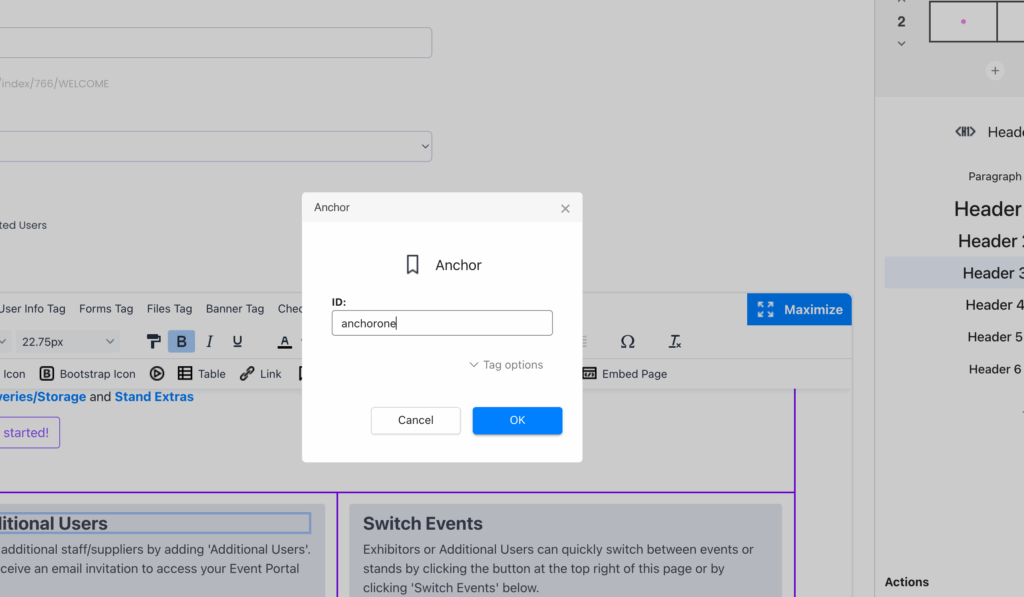
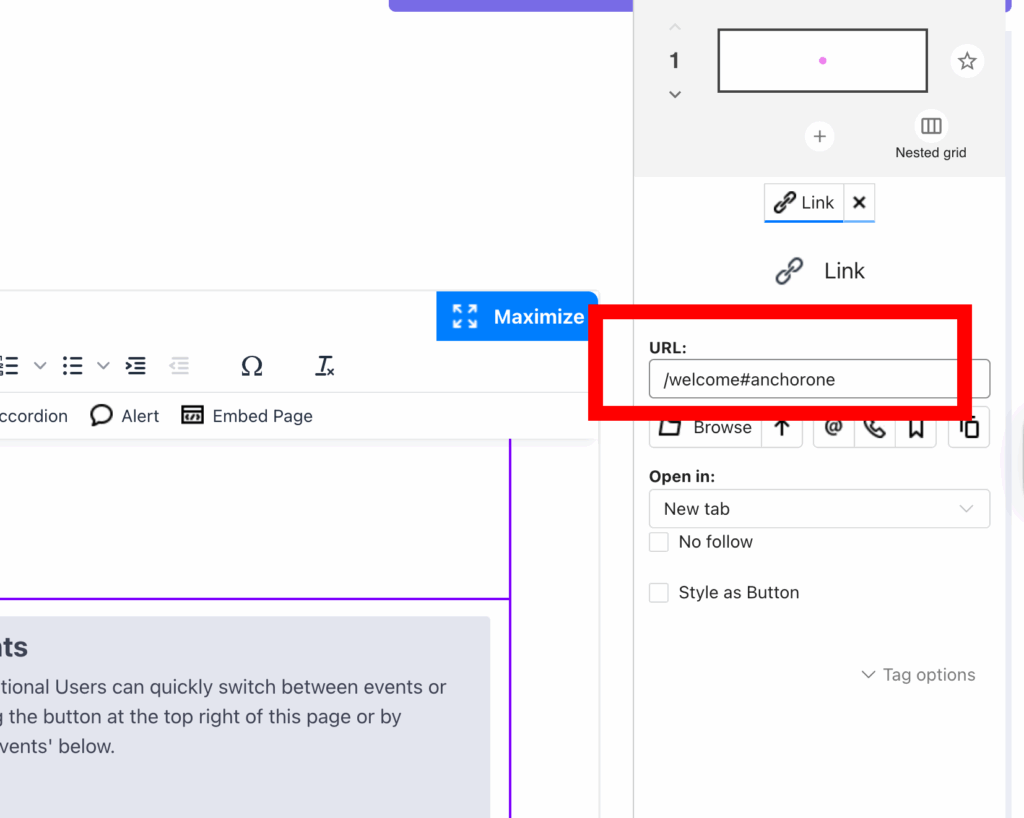
Copy or Create the Link
Now that you’ve added an anchor, you can make a link that goes straight to it.
-If you’re linking from another page inside XpoBay, use a short (relative) link. This keeps it working even if the event is duplicated.
Example: /welcome#anchorone
-If you’re linking from outside XpoBay, such as from your event website or an email, use the full (absolute) link.
Example: https://my.xpobay.com/home/index/468/Anchor-test#sendmehere
Advanced Tips and Troubleshooting
Master advanced features and resolve common issues with the editor to optimise your portal’s functionality and design.
1. Tips for Advanced Users:
• Responsive Previews: Test your portal’s appearance on mobile devices using responsive previews to ensure a seamless user experience across all screen sizes.
• Organise Content: Structure your content hierarchically with clear headings and subheadings to improve readability and navigation.
2. Troubleshooting Common Issues:
• Video Responsiveness:
Problem: “Why isn’t my video responsive?”
Solution: Check the embed settings to ensure responsiveness is enabled.
• Block Resizing:
Problem: “Why can’t I resize a block?”
Solution: Make sure the block is selected before attempting to resize it.
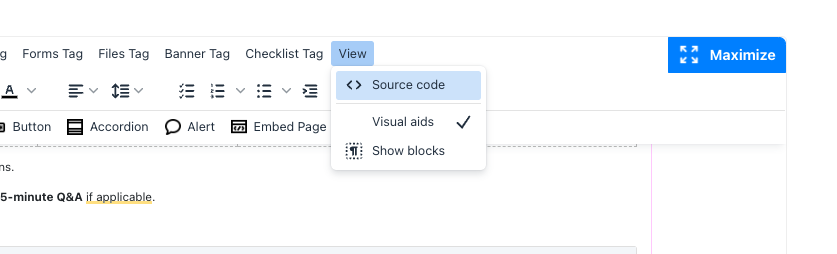
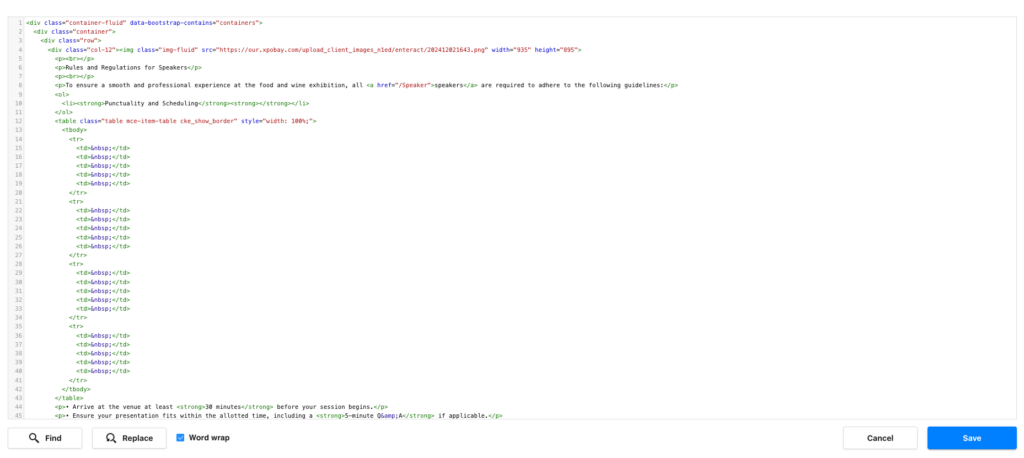
3. Accessing and Editing Source Code:
For advanced customisation, the Page Editor provides access to the HTML source code of your page.
– Navigate to View >> Source Code in the editor.
– The HTML of your page will open in a code editor.
– Make the desired changes to the code and save them.
– Use this feature to fine-tune your design or incorporate elements not available in the visual editor.
By leveraging these advanced tips and troubleshooting techniques, you can create a more functional, visually appealing, and user-friendly portal.
This guide provides a comprehensive overview of the Event Page Editor, helping you navigate and utilise its features effectively. For further assistance, feel free to contact our support team.