The Approval Workflow feature allows you to control submissions by requiring designated approvers to review and approve form responses. Follow these steps to enable this feature on your forms:
Step 1: Access the Form
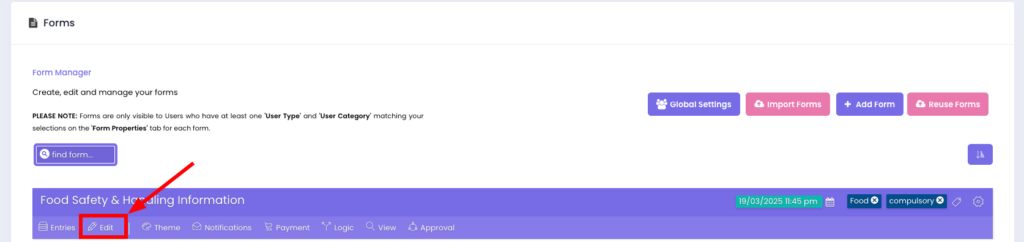
1. Navigate to the Content section of your event portal.
2. Select Forms to view the list of existing forms.
3. Click Edit in the form you want to enable the approval workflow for.
Step 2: Enable the Approval Workflow
1. In the form editor:
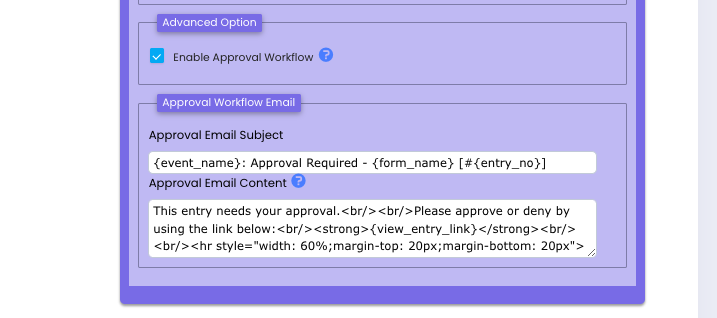
• Go to the Form Properties tab and click Show More Options to reveal additional options.
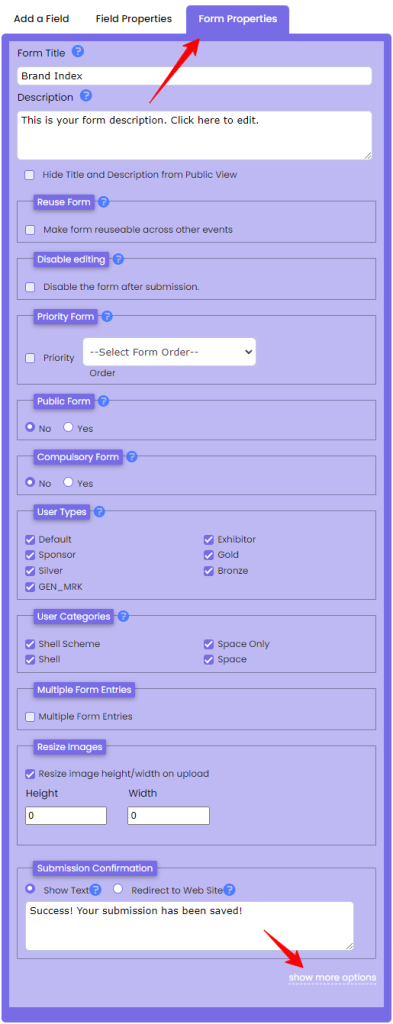
• Locate the Approval Workflow setting and toggle it on.
2. Click Save to confirm your changes.
Step 3: Configure the Approval Workflow
Once enabled, you’ll notice a new Approvals icon in the navigation menu of your Form Manager.
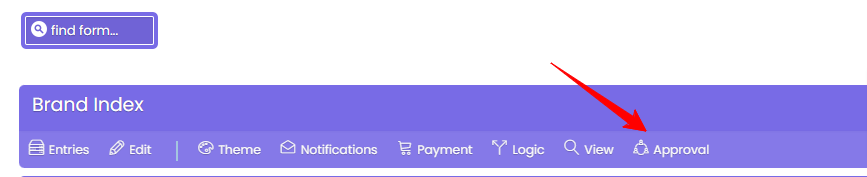
You may use this menu for:
• Add Approvers:
– Specify the users who will review and approve submissions for this form.
• Set Approval Rules:
– Choose between options such as single approver, multiple approvers, or sequential approval.
For detailed guidance on configuring the Approval Workflow, refer to this article here.
FAQs
• Can I enable the Approval Workflow for multiple forms?
Yes, this feature can be enabled individually for any form in your event portal.
• Can I change the approvers after enabling the workflow?
Yes, approvers can be added or removed at any time through the Approvals menu.
By enabling the Approval Workflow, you ensure greater control and oversight over form submissions, streamlining your event management process.