Set up notification emails to stay updated and keep users informed.
Enabling Notifications
After creating a form, you can enable notifications to ensure XpoBay sends emails to you, the user submitting the form, or any other recipient of your choice. This requires enabling notifications and specifying the destination email address.
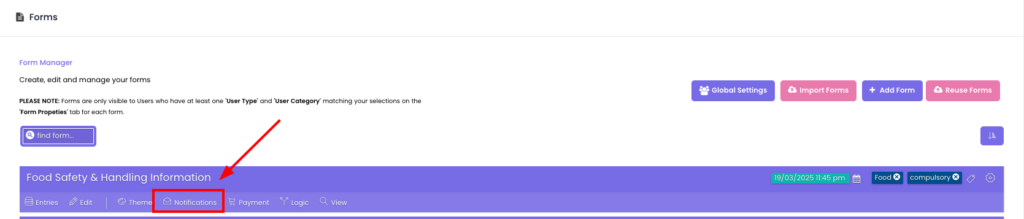
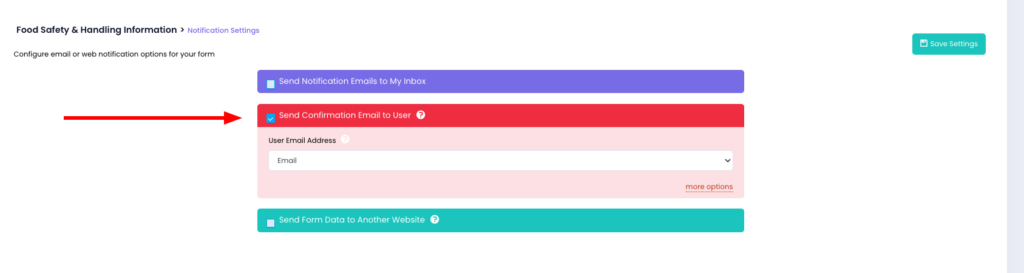
To begin, navigate to your Form Manager and click the Notifications icon.
Next, enable the Send Confirmation Email to the User option by ticking the checkbox. For example, to receive notifications in your inbox, check the option labeled Send Notification Emails to My Inbox.
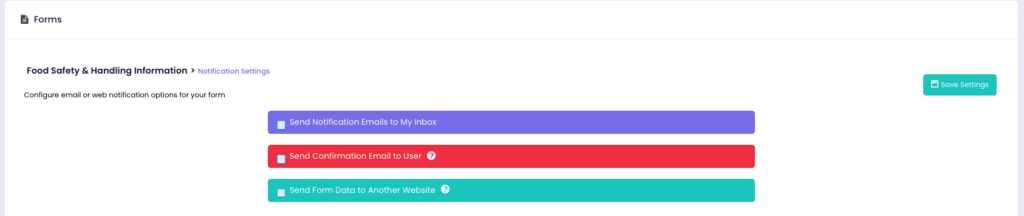
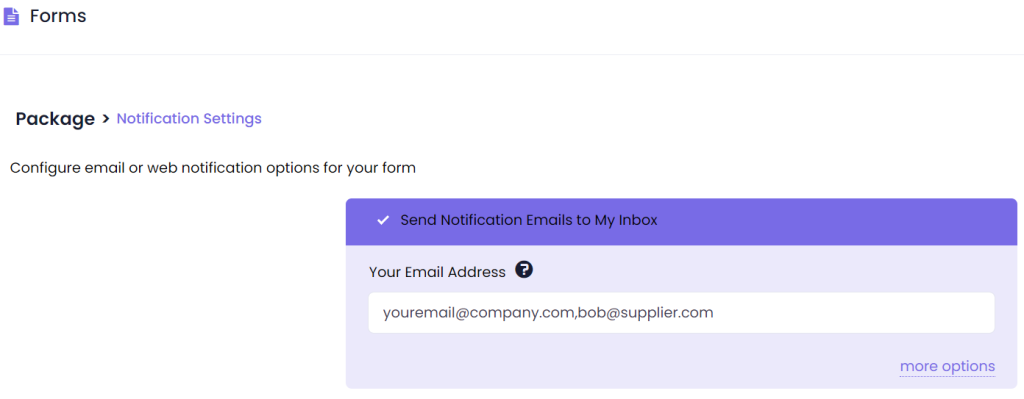
Enter the email address where notifications should be sent. You can also specify multiple email addresses by separating them with commas.
Once configured, save the settings to complete the setup.
Setting Up Auto-responder Emails
Auto-responder emails are ideal for sending a receipt or a copy of form submissions back to the user who filled out the form.
First, ensure your form includes an email field.
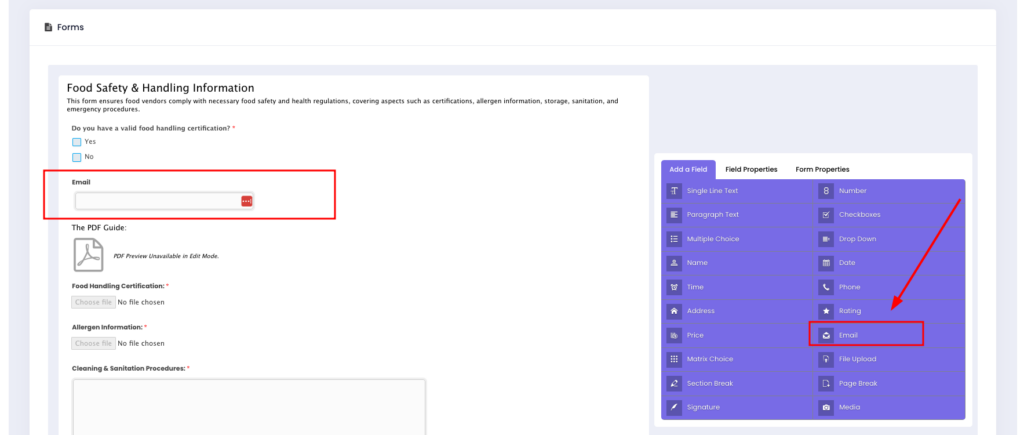
If your form does not include an email field, the following message will appear:

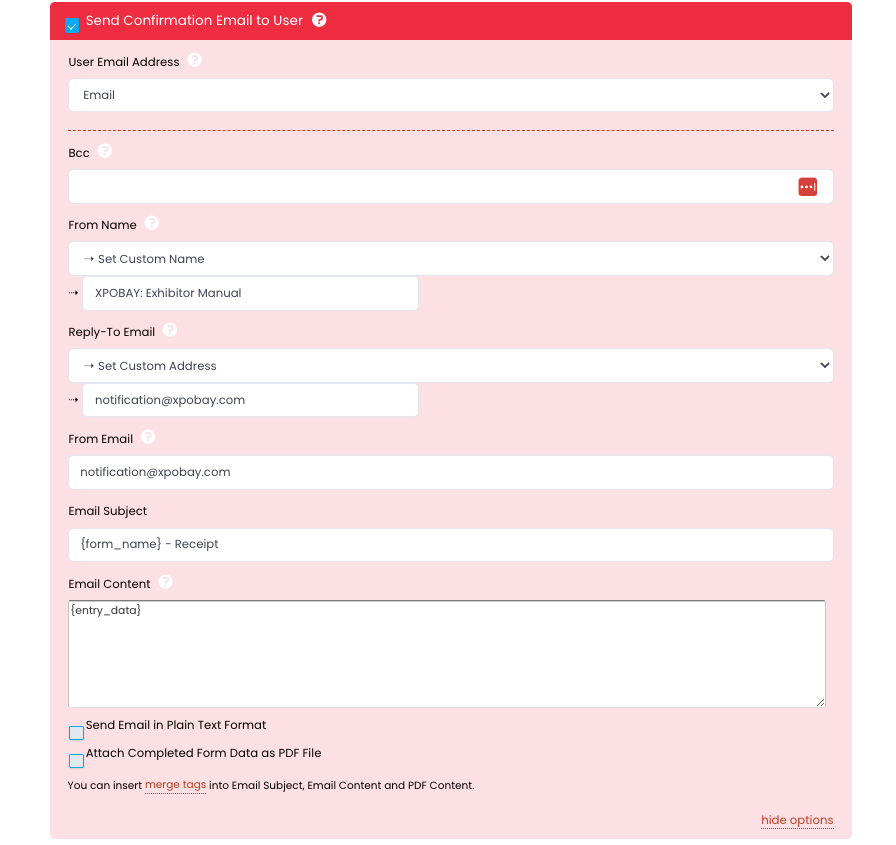
Next, enable the Send Confirmation Email to User option by ticking the checkbox. Select the email field from the dropdown menu. The auto-responder will use the email entered by the user in this field as the recipient address.
You can customise additional settings, such as From Name, Reply-To Email, Email Subject, and more, by clicking on More Options.
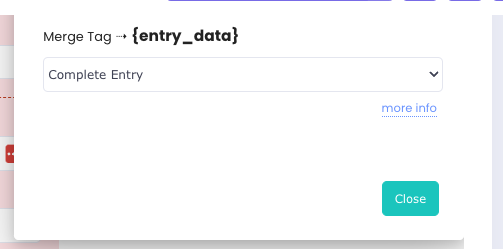
While customising these fields, you can also use Merge Tags to dynamically insert user-submitted data into your email notifications.
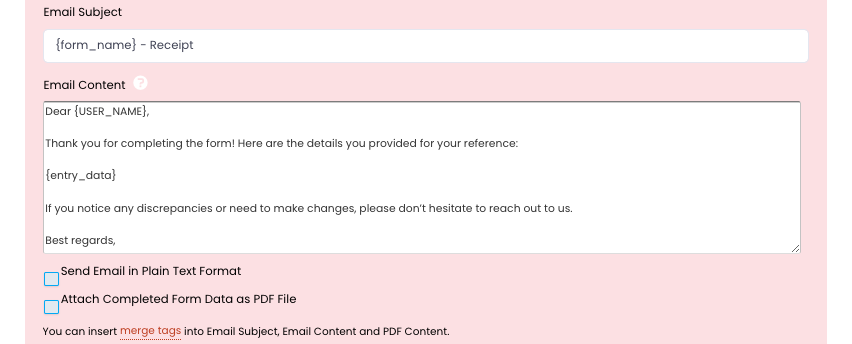
Merge tags are special identifiers that are automatically replaced with the data entered by a user in the form. To use merge tags, simply click on the Merge Tags option to view a list of available fields from your form. Copy the tag name (including curly braces, e.g., {USER_NAME} or {entry_data}) and paste it into the email content, subject, or any other field that supports it.
For example, {USER_NAME} can be used to include the user’s name, and {entry_data} can dynamically display their submitted details.
Don’t forget to click Save Settings to finalise your configuration.
Note: Customising the From Email Address
• Self-Hosted XpoBay: use an email address from the same domain as your XpoBay installation to ensure delivery.
• Cloud-Hosted XpoBay: depending on your plan, you may customise the From Email using any address.
Tips for Effective Email Notifications
– Use clear and concise subject lines for your notification emails.
– Ensure email templates are tested with different addresses to avoid errors.
– Combine notifications with conditional logic to send context-specific emails.