How to put your form fields into columns.
XpoBay supports several Built-in Classes to allow you to create more advanced layouts of your form fields, such as two fields on a row, three fields on a row and so on. Up to six fields in a row.
Below is the list of the built-in classes:
- column_2
- column_3
- column_4
- column_5
- column_6
Using Built-in Classes to Add Columns
So how do we use it?
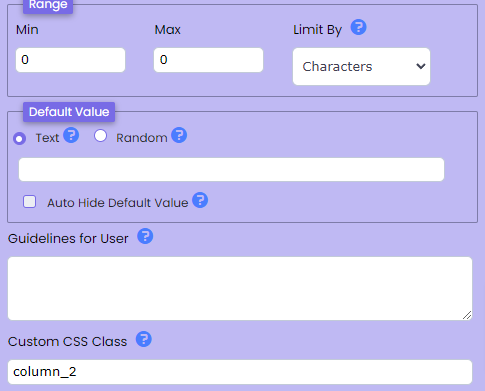
It’s very simple. You only need to add the class to the fields you would like to align. Simply edit your form using the Form Builder and click your field to display the field property. Then put the class name into the Custom CSS Class property.
For example, let’s say we have two text fields as below:

To align those fields into a line (which in turn creates 2 columns within a row), edit each field and add column_2 class.
Save your form and the result is:

Simple and easy right?
Now if you need to create more columns, you can use the other class names and make sure to assign the same class name to the fields you would like to align into one row.
Three Columns
column_3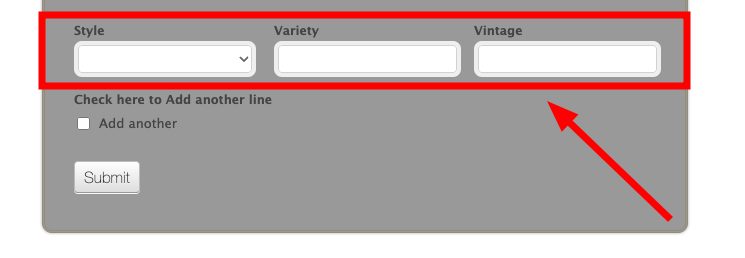
Four Columns
column_4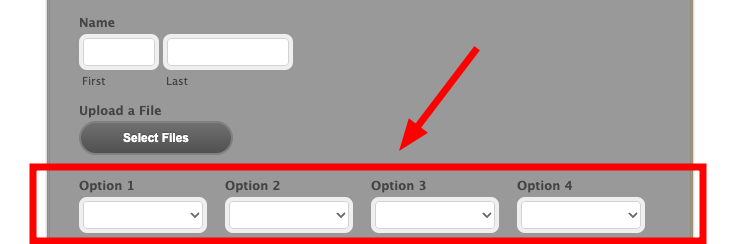
Five Columns
column_5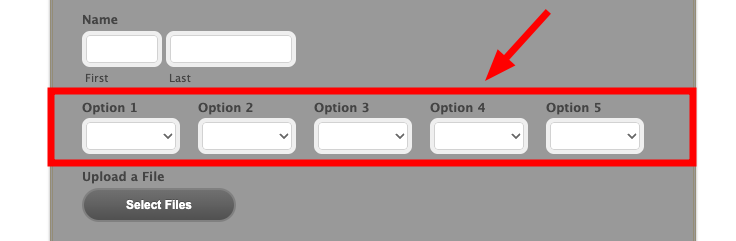
Six Columns
column_6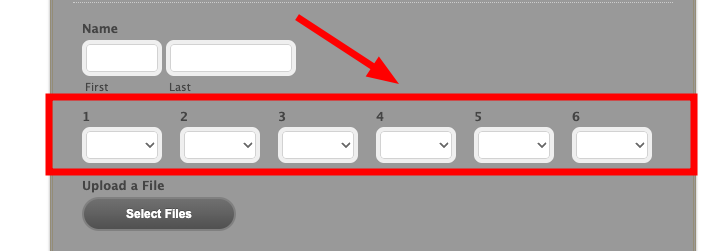
Forcing New Row
In some cases, depending on your layout, the columns might not be aligned properly, and the fields might overlap each other.
The solution for this issue is to add a new_row class to the first field of each row.
Like this:

Make sure to put a space between column_2 and new_row.
Final Notes
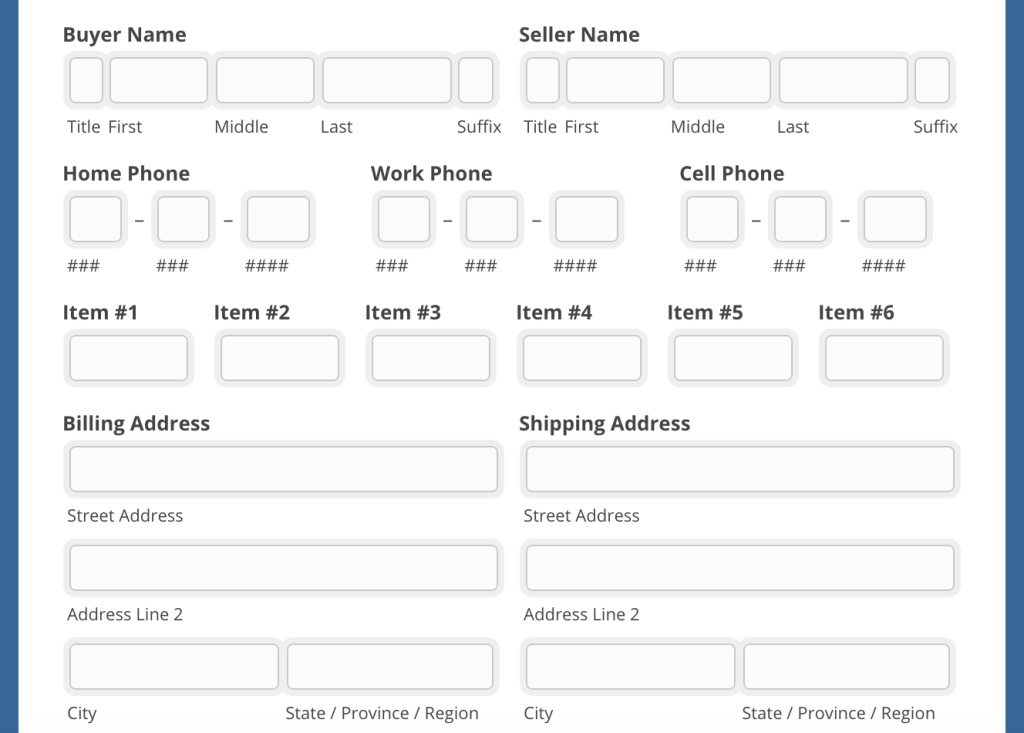
As you can see, the built-in classes are very useful for aligning your fields in a row. You can create multiple columns within a form, each row having its column size, such as this:
However, there are some exceptions with the field alignment class. It won’t work on Matrix Choice and Section Break fields. Also, these only work if you are using the default alignment for the field labels (Top Aligned). If you are using Left or Right Label Alignment for your fields, this won’t work.