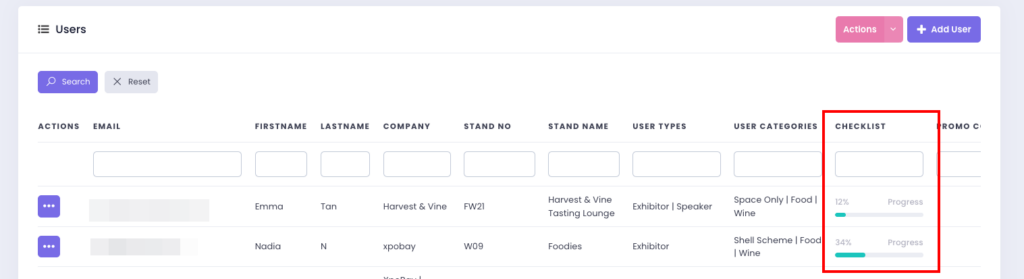
Checklists in XpoBay are highly versatile, enabling organisers to dynamically assign tasks to users based on their User Types (UTs) and User Categories (UCs). This ensures that every user receives a bespoke checklist tailored to their role, with 100% relevant tasks.
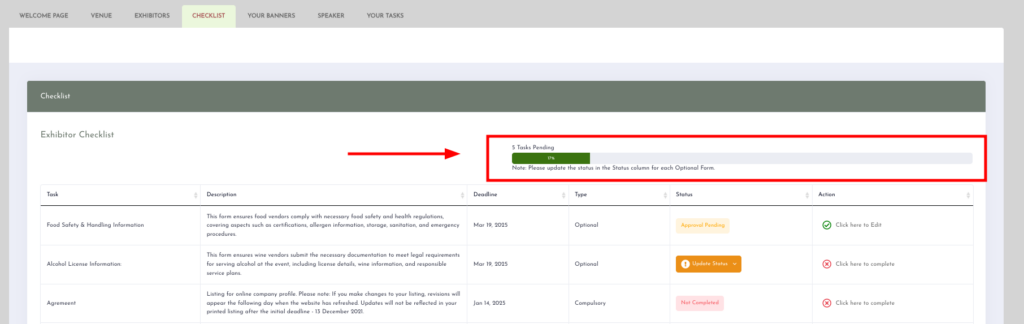
Organisers can create multiple checklists to address different aspects of the event, such as compulsory and optional tasks. These checklists help ensure that no task is overlooked, as users are reminded about their pending tasks until they are completed.
Adding a checklist to a page is straightforward and allows you to dynamically display a group of tasks to the relevant users.
Follow these steps to set it up:
1. Create a Checklist
Before adding a checklist to a page, ensure that the checklist is created. If you need guidance on this, refer to our article on How to Create a Checklist.
2. Navigate to Pages
– Go to Content in the main menu.
– Click Pages & Menus to open the list of pages.
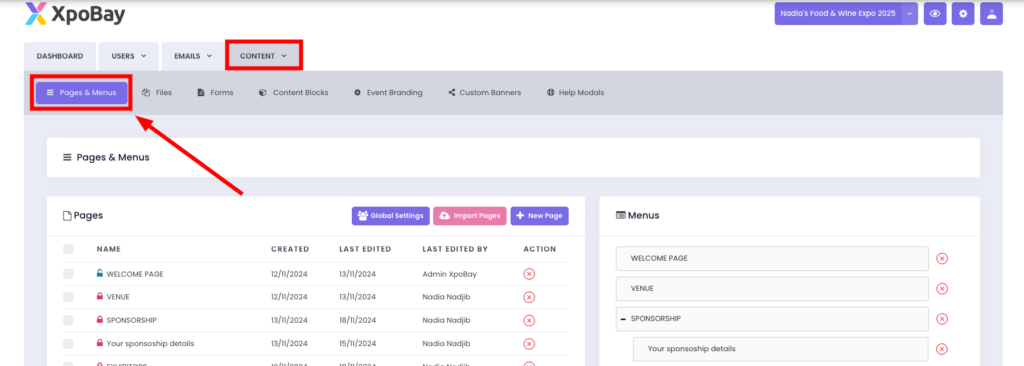
– Locate the page where you want to add your checklist and click to edit it.
– In the page editor, you’ll find the Checklist Tag field.
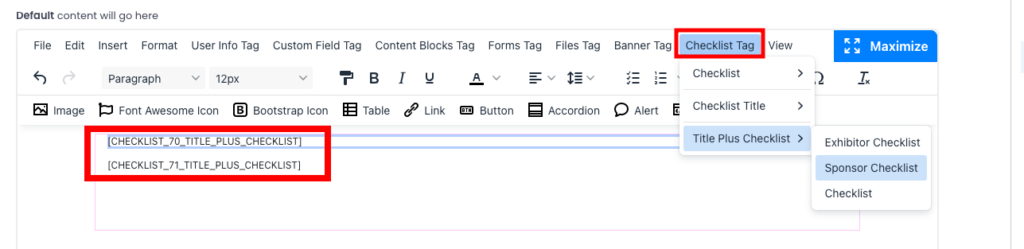
3. Add One or More Checklists to a Page Using [TAGS]
You can now display checklists directly on pages using [TAGS]. This allows you to integrate checklists dynamically and customise their appearance.
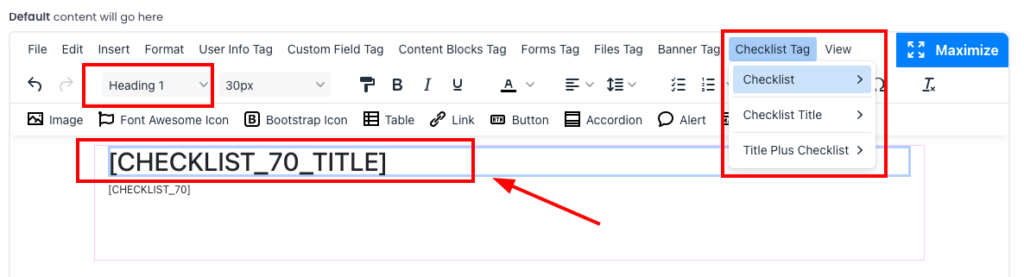
A. Separate Title and Checklist
This approach allows you to format the title separately:
• Tag for Title: Use [CHECKLIST_ID_TITLE] to display the title of the checklist.
• Formatting the Title: Apply a heading style to this tag by selecting it and formatting it as a heading (e.g., H1, H2, etc.).
• Tag for Checklist Content: Use [CHECKLIST_ID] to display the content of the checklist.
📌 Example:
[CHECKLIST_70_TITLE]
[CHECKLIST_70]
If you wish to display multiple checklists on the same page, repeat this process for each checklist by adding their respective tags.
B. Combined Title and Checklist
For a straightforward approach, use a single tag:
• Tag: Use [CHECKLIST_71_TITLE_PLUS_CHECKLIST].
• Note: This method offers less control over the heading size but provides a combined display of the title and checklist.
📌 Example:
[CHECKLIST_71_TITLE_PLUS_CHECKLIST]
You can also add multiple checklists using this method by adding their respective tags.
C. Save the Page
Once you’ve added the checklist tag, don’t forget to save the page to apply the changes.
4. Preview of Checklist Display
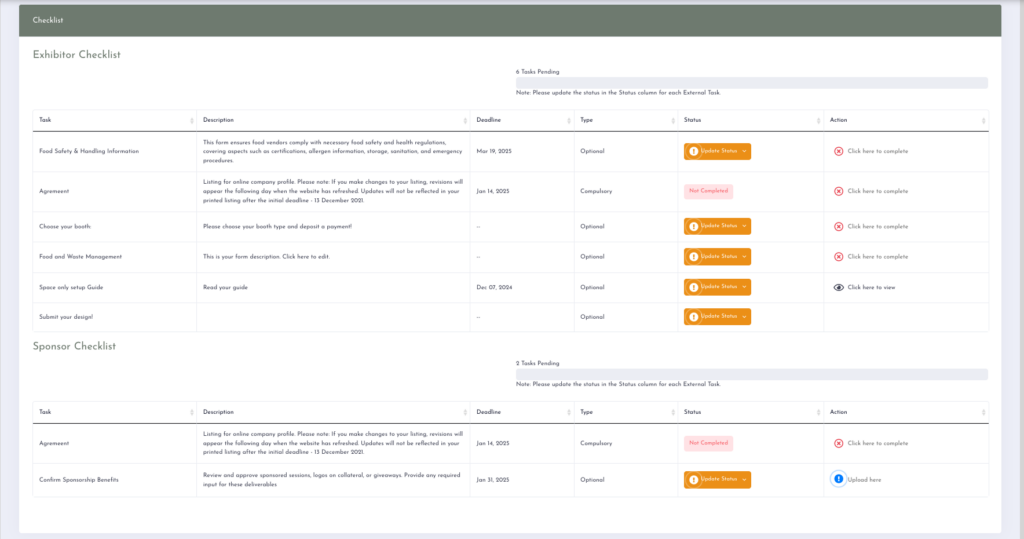
Once the page is published, users will see their assigned checklists, each with a progress meter tracking task completion. Organisers can also monitor each user’s progress across both internal and external tasks.
Note: The Organiser sees the average completion rate across all checklists assigned to a user. For example, if an exhibitor has three checklists, their progress reflects the combined completion of all tasks.