Customising your notification emails allows you to tailor messages to reflect your brand and communicate effectively with users. This guide provides step-by-step instructions on how to customise your notification emails and includes a simple HTML example.
Access Notification Settings
• Navigate to your Content section.
• Select Forms and choose the form you wish to customise notifications for.
• Click on the Notification option to open the notification settings for that form.

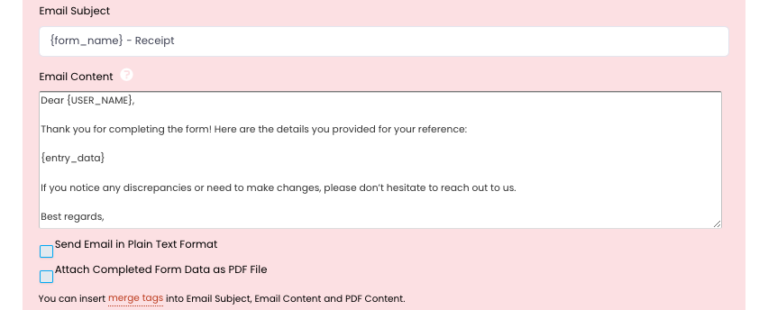
Edit the Content
• Tick the checkbox to enable editing of your email notification or confirmation email.
• And click more options
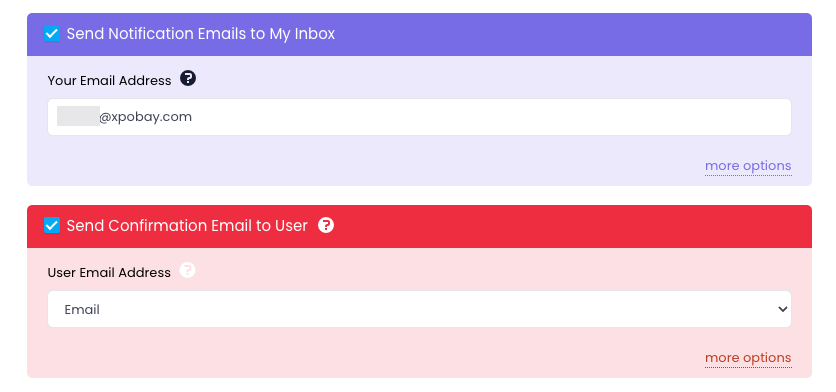
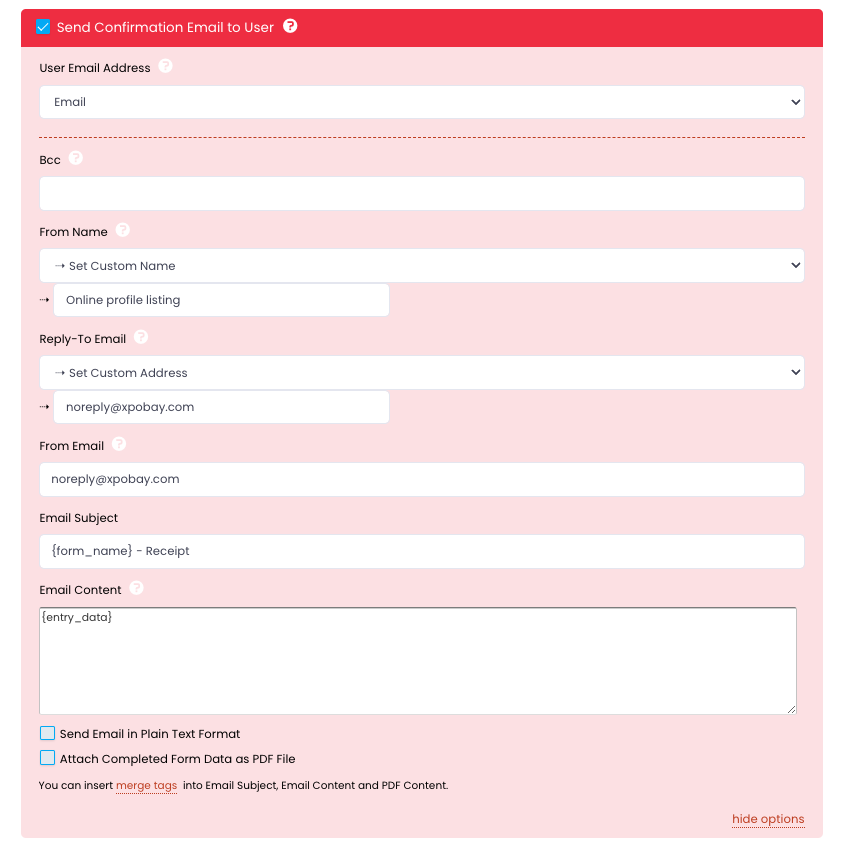
• Detailed notification or confirmation options will be displayed, and you can change any part of the settings to suit your needs.
Using Merge Tags
Merge tags are dynamic placeholders that automatically populate with data provided by the user in the form. They make it easy to personalise email content with details like the user’s name, email, or form responses.
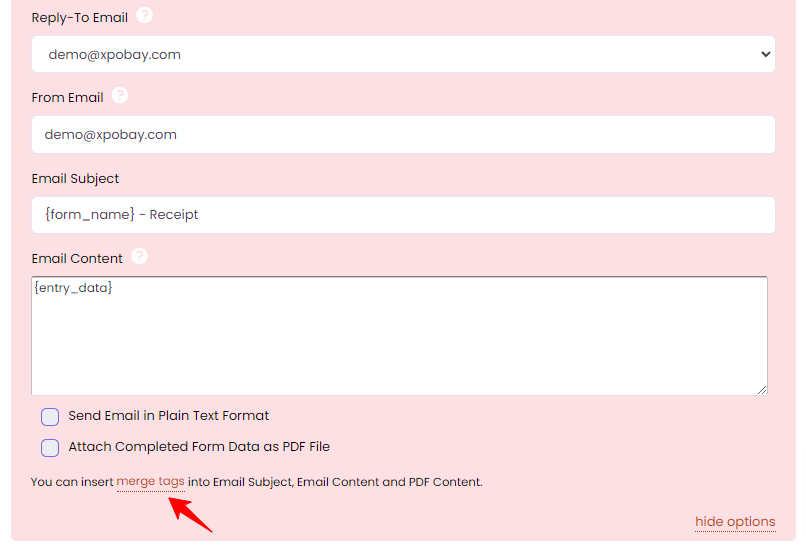
To use merge tags:
1. Click on the Merge Tags option to view a list of available fields from your form.
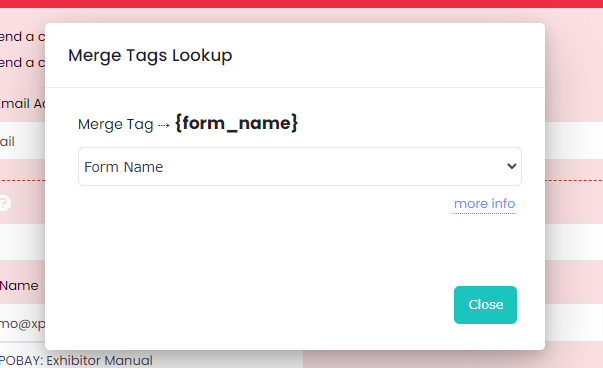
2. A window will display all the merge tags associated with the selected form.
3. Copy the desired merge tag exactly as displayed, including curly braces (e.g., {USER_NAME} or {entry_data}), and paste it into the email subject, body, or any other field that supports merge tags.
When the email is sent, the merge tags will automatically be replaced with the corresponding data from the user’s form submission. For example:
• Template: “Dear {USER_NAME}, thank you for completing the form!”
• Result: “Dear John Smith, thank you for completing the form!”
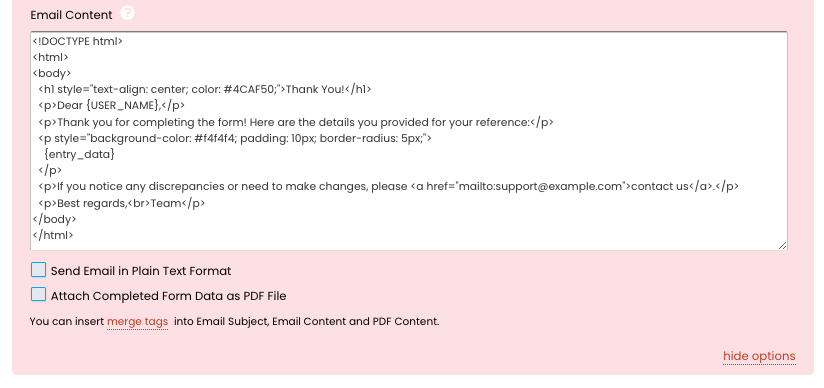
Using HTML Code
In addition to using merge tags, you can enhance your Email Content template by incorporating HTML code. You can either insert a fully-fledged HTML email template or use simple HTML tags for basic formatting and design.
If you already have an HTML email template, you can easily integrate it with XpoBay and combine it with merge tags to dynamically populate user-specific data.

Simple HTML for Email Customisation
• Heading Tags: To create headings of different sizes.
Example: <h1>, <h2>, <h3>, etc.
<h1 style="color: #4CAF50;">Welcome to Our Service</h1>• Paragraph Tags: To structure text into paragraphs.
Example: <p>
<p>Dear {USER_NAME},</p>• Bold and Italic Text: To emphasise text.
Example: <strong> for bold, <em> for italic.
<p><strong>Thank you</strong> for completing the form!</p>
<p><em>We appreciate your effort.</em></p>
• Lists: To organise items in a list.
Example: <ul> for unordered lists, <ol> for ordered lists.
<ul>
  <li>Form Name: {form_name}</li>
  <li>Submission Date: {date_created}</li>
</ul>
Here’s a simple HTML email template that combines merge tags:
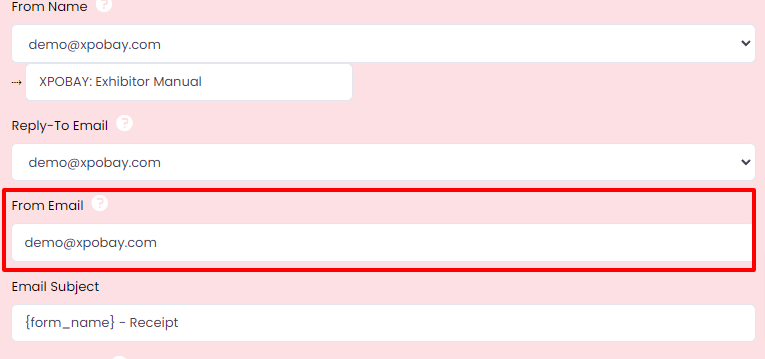
Sender Email Address
The From Email setting plays a crucial role in ensuring the successful delivery of your notification emails. Here’s what you need to know based on the type of XpoBay hosting you’re using:
Adding Custom Branding and Formatting
– If you require a fully customised HTML email design, consider working with an HTML email developer to create a template that ensures proper formatting across different email clients.
Best Practices for Email Customisation
– Keep the message clear and concise.
– Use relevant placeholders to personalise the content.
– Ensure that important information, such as deadlines or next steps, is easy to read.
– Test your email to verify formatting and deliverability.
By customising notification emails, you can enhance communication with exhibitors, sponsors, and other users while maintaining consistent branding.